All Posts By:

Harvey Morris

Entrees

Your Recipes (and Family!) Deserve Only The Very Best Ingredients

chicken vesuvio

This is a sponsored post written by me on behalf of Harvestland® by Perdue®. All opinions are 100% mine.

I’ve always believed that when you cook for your family you should use the very best ingredients available to you — and to keep the recipes you often use as simple as possible. Cooking can be therapeutic to you as the home cook, and coming together as a family to the dinner table has additional benefits for your family’s health. Simplicity is the key.

And sometimes keeping it simple means finding shortcuts in the food preparation or cooking process. Finding ingredients you can trust doesn’t have to be hard, if you know where to look. Harvestland® by Perdue®, available at Walmart, has fresh and fully cooked turkey, chicken and pork products. These products come from local family-owned farms throughout the United States and are USDA process verified.

undefined

That means Harvestland® by Perdue®’s all-natural products are:

  • Raised cage free
  • Fed all-vegetarian diets (no animal by products!)
  • Free of antibiotics and contain no artificial ingredients

You can trust Harvestland® by Perdue® to be a natural choice for your family when you’re cooking at home. It’s food that’s pure and simple, which allows your family to Eat Like Your Ancestors.™ What does that mean exactly? Check out this fun video to find out!

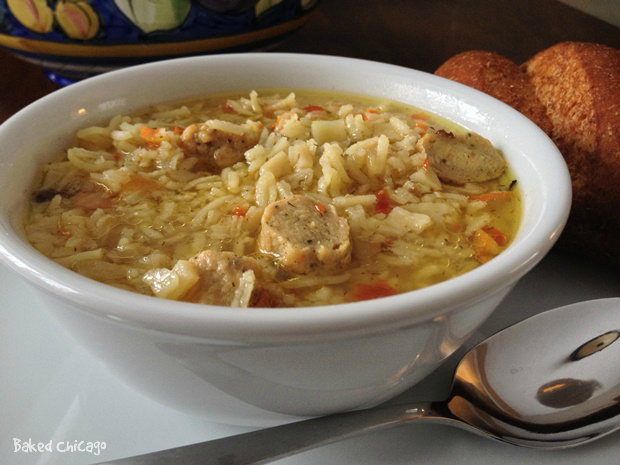
Luckily it’s gotten easier in the modern world to cook for your family. My favorite secret weapon for a hearty, wholesome meal is my slow cooker. Try my Chicken Vesuvio (family-style recipe) with your family. Substitute your kin’s favorite root vegetables for a one-pot wonderful meal that will nourish the body and soul.

Family-style Chicken Vesuvio Recipe

chicken vesuvio

Ingredients

  • 2 tablespoons Italian seasoning
  • 1 teaspoon sea salt
  • 1 teaspoon ground black pepper
  • 6 Harvestland® by Perdue® Fresh Boneless Skinless Chicken Breasts
  • 1 tablespoon canola oil
  • 1 pound small red potatoes, scrubbed and cut into wedges
  • 12 ounces edamame, shelled
  • 1 cup sweet yellow and red peppers, julienned
  • 1/4 cup sun-dried tomatoes, julienned
  • 3 tablespoons minced onion
  • 4 cloves garlic, minced
  • 1/2 cup low-sodium chicken broth
  • 1/2 cup dry white wine
  • 1/4 cup fresh chopped parsley for garnish

Directions

Lightly coat a frying pan with canola oil and place on a stovetop burner, set on medium-high. Warm the pan for a minute so it is hot enough to sear the chicken breasts.

Pat the chicken breasts dry with a paper towel. Using a barbecue brush, lightly coat the top of each chicken breast with canola oil. Season with a pinch each of sea salt, black pepper, and Italian seasoning. Place the chicken breasts in the hot frying pan, seasoned side down. Cook for about 6 minutes.

Immediately coat the remaining side of each chicken breast with oil. Season with one pinch each of sea salt, black pepper and Italian seasoning. Cover the pan with a lid until you’re ready to turn the chicken breasts. After you turn the chicken breasts, cook for another 6 minutes or until both sides are browned.

Place the potatoes, edamame, peppers, sun-dried tomatoes, onion, garlic and remaining sea salt, black pepper and Italian seasoning in a 6-quart slow cooker. Add chicken broth and white wine. Gently stir to immerse vegetables evenly in the broth mixture. This helps the vegetables to properly steam and cook evenly. Top the vegetables with the chicken breasts.

Cover the slow cooker and cook on HIGH for 3 to 3.5 hours (or LOW for 6 to 7 hours) until chicken breasts and potatoes are tender.

Transfer the chicken and vegetables to a serving plate. Top with juices from the slow cooker. Garnish with fresh parsley and serve immediately.

Cook Time: 3 hours, 12 minutes. Yield: 6 servings.

undefinedSave $1.00 off Harvestland Fresh or Frozen Chicken.

Visit Sponsors Site

Entrees/ Events & Entertaining

Panda Express Chinese Spare Ribs: Boldly Chinese and Classically American

Panda Express

This is a sponsored post written by me on behalf of Panda Express. All opinions are 100% mine.

The Panda Shoots and Scores

Just in time for your next March Madness viewing party, Panda Express has introduced Chinese Spare Ribs to its menu. These Chinese Spare Ribs are slow cooked for five (5) hours with sesame oil, red chili bean paste, garlic, mirin (a sweet rice wine) and red peppers for a one-of-a-kind flavor that is both boldly Chinese and classically American.

Since 1983, Panda Express has been a family-owned company dedicated to bringing families together at the dining table with delicious, high-quality food. The new Chinese Spare Ribs are perfect for any family gathering or celebration like Uncle Bill’s 50th birthday party or entertaining your neighbors and friends for the next big basketball game. The sweet, spicy and savory goodness and fall-off-the-bone tenderness of Panda Express Chinese Spare Ribs will satisfy kids and adults alike.

undefined

East Meets West On Your Tongue

This is the kind of casual, contemporary Chinese dish that is uniquely Panda Express. Inspired by authentic Chinese BBQ flavors, these Chinese Spare Ribs are premium, high-quality ribs conceived in the Panda Express kitchens by Chef Andy Kao, a 30-year veteran who leads the Panda Express culinary team. In this dish, Chef Kao brings together American slow cooked St. Louis-style spare ribs with Char Siu, a traditional Chinese barbecued pork.

Available only for a limited time, it’s easy to Order Online from Panda Express and enjoy these authentic Chinese BBQ flavors at home with your entire family. Learn more about Panda Express Chinese Spare Ribs, and other menu items, by visiting Panda Express on Facebook, Twitter or Instagram.

chī hǎo hē hǎo 

This literally translates as “eat well and drink well” but it actually means “enjoy your meal.” When you bring Panda Express Chinese Spare Ribs to your next family gathering, you’re guaranteed to enjoy your meal and the company!

Visit Sponsors Site

Breakfast

Potato-Ricotta Frittata: A new take on brunch that’s easy to make and bake!

This is a sponsored post written by me on behalf of Simply Potatoes. All opinions are 100% mine.

Nothing could be more relaxing than the thought of having a weekend brunch with the entire family! Unless you’re the one who’s cooking it.

Making brunch for one or a bunch named Brady (that’s nine if you count Alice!) doesn’t have to be time-consuming or complicated. I’ll tell you my best brunch secret: a one-skillet or one-pan breakfast casserole recipe with Simply Potatoes®.

[To win a month’s supply of Simply Potatoes, enter contest at end of this post.]

I’ve been cooking with Simply Potatoes for more than 10 years and the (loads of) prep time I save while getting brunch on the table means I can savor my some bold, dark roast coffee and read the Sunday paper while my favorite breakfast casserole is baking in the oven. And because Simply Potatoes are fresh, but never frozen, they cook up faster no matter how you use them.

You’ll find Simply Potatoes in the refrigerated dairy section of your local grocery. I find them in my grocery store right next to the eggs, so I always grab a few packages with a dozen jumbo eggs to have on hand for the next time I get hungry for a skillet breakfast scramble.

In this recipe for Potato-Ricotta Frittata (don’t you love the alliteration!), I use Simply Potatoes shredded hash browns. Frittatas are a type of hearty Italian egg dish that is typically easier to make than omelets. And it’s easy to feed a family from a single skillet or baking pan.

potato-ricotta frittata #SimplyPotatoes

And sometimes I’ll change it up and use Simply Potatoes O’Brien hash browns, Southwest style hash browns, diced potatoes with onion, or steakhouse seasoned diced potatoes. I love the versatility of this brunch recipe: you can mix + match any of your favorite Simply Potatoes cut potatoes products along with your family’s favorite vegetables and breakfast meats to create your family’s own signature brunch casserole.

From the front….

potato-ricotta frittata #SimplyPotatoes

…or from the back…

potato-ricotta frittata #SimplyPotatoes

…it looks scrumptious from any direction. But dibs on one of the corner pieces for me! I love that golden brown and slightly crispy crust around the edges.This is what I call a biteful of brunch bliss!

Potato-Ricotta Frittata Recipe

Ingredients:

  • 12 large eggs
  • 3 cloves garlic, minced
  • 1 medium onion, diced
  • 1 teaspoon sea salt
  • 1/2 teaspoon ground black pepper
  • 1 tablespoon Italian seasoning
  • 1/4 cup milk
  • 14 ounces shelled edamame
  • 20 ounces Simply Potatoes shredded hash browns
  • 1 cup baby spinach, chopped
  • 5 ounces shaved Parmesan cheese
  • 15 ounces ricotta cheese
  • 6 ounces roasted red bell pepper (from a jar), cut into bite-sized pieces

Directions:

Preheat your oven to 350 F degrees. Spray a 9×13-inch baking pan with non-stick cooking spray; set aside.

This dish is easiest to prepare if you first gather your ingredients – also known as mise en place.

potato-ricotta frittata #SimplyPotatoes

In a large bowl, whisk together the eggs, garlic, onion, salt, pepper, Italian seasoning and milk until frothy.

Pour half of the egg mixture into the prepared baking pan. Place the edamame in a single layer over the egg mixture. Repeat the layering with the shredded hash browns and spinach.

potato-ricotta frittata #SimplyPotatoes

Then layer generously with the shaved Parmesan cheese.

potato-ricotta frittata #SimplyPotatoes

Pour the remaining egg mixture over these ingredients.

Dollop spoonfuls of the ricotta cheese evenly over the egg mixture; top with red pepper pieces.

potato-ricotta frittata #SimplyPotatoes

Bake for 40 – 45 minutes, or until eggs are completely set and edges are golden brown.

potato-ricotta frittata #SimplyPotatoes

Slice and serve immediately.

potato-ricotta frittata #SimplyPotatoes

Make It Ahead: You could assemble this dish the night before the next morning’s brunch. Cover baking pan with airtight plastic wrap and store in the refrigerator. Allow for an extra 5 to 10 minutes of cooking time.

Prep time: 15 minutes; Cook time: 40 minutes; Makes 8 servings.

For other great brunch ideas your entire family will love, visit the Simply Potatoes Breakfast Lovers website and follow Simply Potatoes on Pinterest.

Baked Chicago is giving away a one month’s supply of #SimplyPotatoes! Enter below:

a Rafflecopter giveaway

Visit Sponsors Site

Desserts

7 Must-Have Recipes for National Peanut Butter Lover’s Day

peanut butter banana bread with roasted cacao nibs

It’s National Peanut Butter Lover’s Day and which recipe will you choose to celebrate with? We say turn the day into National Peanut Butter Lover’s Week and make one recipe a day for a true decadence-filled week of peanut butter flavor!

Sunday: Peanut Butter Granola-Pumpkin Bread

peanut-butter-granola-pumpkin-bread

 Monday: Peanut Butter-Banana Nut Pound Cake

pb-banana-bread-3

Tuesday: Peanut Butter Brownie Biscotti

peanut-butter-brownie-biscotti

 Wednesday: Peanut Butter Whirled Brownies

peanut-butter-whirled-brownies

 Thursday: Peanut Butter Lava Mug Cake

peanut-butter-lava-mug-cake-hero

 Friday: Baked Honeycrisp Apples with Peanut Butter & Pretzel Topping

IMG_0291

 Saturday: Peanut Butter Pound Cake

Pound cake

Peanut butter by the numbers*:

  • It takes about 540 peanuts to make a 12-ounce jar of peanut butter.
  • Americans spend about $800 million a year on peanut butter.

*For more fun facts about peanuts, visit the National Peanut Board’s website.

Desserts

Marshmallow Cookie Crunch Brownies

This is a sponsored post written by me on behalf of Dollar General. All opinions are 100% mine.

When I walked into my local Dollar General store, I was amazed at the variety of grocery items available, including milk, eggs and butter. I love to bake and every pantry staple I could think of was on the shelves. And at lower prices than most stores.

marshmallow cookie crunch brownies

So I decided to make a variation on one of my favorite brownie recipes, inspired by the Clover ValleyTM animal crackers and mini marshmallows I found.

marshmallow cookie crunch brownies

The animal crackers were so adorable that I couldn’t resist eating a few while preparing the brownies. Delish by themselves. But even better inside these Marshmallow Cookie Crunch Brownies!

marshmallow cookie crunch brownies

Marshmallow Cookie Crunch Brownies

Prep Time: 15 minutes; Total Time: 45 minutes

Ingredients:

  • 10 tablespoons unsalted butter
  • 1 3/4 cups Clover ValleyTM granulated sugar
  • 3/4 cup unsweetened cocoa powder
  • 1 cup Clover ValleyTM all-purpose flour
  • 1 teaspoon Clover ValleyTM baking powder
  • 2 cups Clover ValleyTM animal crackers cookies (or substitute your favorite sandwich cookie, chopped)
  • 1 teaspoon Clover ValleyTM vanilla extract
  • 4 eggs
  • pinch of Clover ValleyTM sea salt
  • 1 1/2 cups Clover ValleyTM miniature marshmallows
  • 2 cups Clover ValleyTM semi-sweet chocolate chips

Directions:

Preheat your oven to 375 F degrees. Lightly grease the bottom of a 13×9-inch baking pan with butter or Clover ValleyTM non-stick cooking spray. Set aside.

Whisk together dry ingredients (cocoa powder, flour, baking powder and salt) in a medium bowl; set aside.

In a large sauce pan, melt butter over low heat. Add granulated sugar, stirring until completely blended with butter. Stir in the flour mixture. When combined, remove from heat and set aside. The mixture will be very dry at this point.

In a large bowl, whisk together eggs and vanilla. Incorporate the egg mixture into the brownie batter in the sauce pan. Stir until well blended. Fold in the animal cracker cookies, marshmallows and chocolate chips.

marshmallow cookie crunch brownies

Pour into the prepared baking pan. Spread the batter evenly to promote even baking. Bake for 25 to 30 minutes, or until set.

Let brownies cool completely, about 1 hour. Cut into 6 rows by 4 rows to make 24 brownies.

marshmallow cookie crunch brownies

Save on your baking needs with Dollar General. For other recipe ideas featuring everyday Clover ValleyTM pantry items that cost less, check out Dollar General on FacebookInstagram and Pinterest.

Visit Sponsors Site

Entrees

Malaysian Black Pepper Chicken Satay

This is a sponsored post written by me on behalf of Malaysia Kitchen for the World. All opinions are 100% mine.

I’ve never cooked Malaysian cuisine before, but I’ve enjoyed Chicken Satay – perhaps Malaysia’s most popular contribution to the culinary world – many times in restaurants. As someone who loves to travel and experience culture through local foods and ceremonies, I wanted to challenge myself to make an authentic Malaysian dish in my own kitchen.

Chicken is one of my favorite proteins to cooks with and I love, love, love black pepper. So I was excited to try creating my twist on a traditional chicken satay with the Malaysian Black Pepper Sauce from Asian Meals®. The aroma of the black pepper sauce was intoxicating. It works both as a marinade or a dipping sauce — and it would definitely add a burst of Malaysian flavor to any burger, steak or fish.

Malaysian cuisine is often considered exotic, colorful and tempting because of its a unique blend of Malay, Chinese and Indian food traditions with Indonesian, Thai, Portuguese and Middle Eastern influences. Quality spices have been at the center of Malaysian cooking for centuries, dating back to when Malaysia became a major crossroad for the ancient eastern spice trade route. Cross-cultural borrowing among the Malays, Chinese and Indians has created a number of dishes that are uniquely Malaysian.

Rice (nasi in Malay) is eaten at most meals and a staple food found in every Malaysian kitchen. Typically, plain rice accompanies an entree — and a more complex rice dish can be a meal on its own. Rice is a perfect complement to a traditional satay, which consists of small pieces of marinated meat (usually chicken) skewered on sticks and grilled over a charcoal fire. Traditional satay dipping sauces often contain peanuts.

In my recipe for Malaysian Black Pepper Chicken Satay, the fresh cucumber slices refresh the palate in a perfect balance to the rich black pepper spices. You could easily prep this dish in the morning and let it marinate while you’re at work. Then when you get home, you’ve got a hot, hearty — and a bit exotic — meal in about 10 minutes.

Malaysian Black Pepper Chicken Satay with Peanut Dipping Sauce 5

Malaysian Black Pepper Chicken Satay with Peanut Dipping Sauce

Prep Time: 30 minutes; Cook Time: 10 minutes; Serves 4 people.

Ingredients

  • 4 chicken breasts (boneless and skinless), cut into medium-sized cubes
  • 1 package of Asian Meals® Malaysian Black Pepper Sauce*
  • Bamboo skewers, soaked in water to avoid burning
  • 1 cucumber, sliced
  • 2 packets of Asian Meals® Malaysian Satay Dipping Sauce*, peanut flavor
  • 2 cups instant brown rice

*available via Amazon.com

Directions

Cut the chicken breasts into medium-sized cubs, large enough to stay together when skewered. Place in a resealable plastic container. Marinate in Malaysian Black Pepper Sauce in the refrigerator for 4 to 8 hours.

Malaysian Black Pepper Chicken Satay with Peanut Dipping Sauce 3

Prepare brown rice according to package directions. Slice cucumber; set aside.

Malaysian Black Pepper Chicken Satay with Peanut Dipping Sauce 4

Thread the chicken on the bamboo skewers and grill for 3 minutes on each side, or until fully cooked with a slight char on the chicken.  Serve hot with fresh cucumber slices, brown rice and peanut dipping sauce.

Malaysian Black Pepper Chicken Satay with Peanut Dipping Sauce 2

For other Malaysian cuisine inspirations, visit the Malaysia Kitchen for the World website and follow Malaysia Kitchen on Facebook, Twitter @MKPUSA or @MalaysiaKitchenUSA on Instagram.

Visit Sponsors Site

Events & Entertaining

Celebrate World Pistachio Day: 7 unbelievably delicious recipes to go nuts over

It’s World Pistachio Day and Baked Chicago is in full-on celebration mode! Pistachios are one of my favorite ingredients to cook with and snack on. I had a small bowl of in-shell pistachios last night while viewing “Watch What Happens Live” with one of my funny goddess icons: Chicago’s Jane Lynch.

pistachio principle

Here are Baked Chicago’s 7 most popular recipes featuring #PistachioPower:

Learn more about the Power of Pistachios at the American Pistachio Growers website.

Beverages

Rum Times: Serving up history with a refreshing twist

This is a sponsored post written by me on behalf of Rums of Puerto Rico . All opinions are 100% mine.

As a long-time travel enthusiast, I’ve discovered that one of the best ways to learn about a destination’s history and its people is through food and drink. Food and drink plays a deeply important role in every culture and its customs. Rum Times, a new web video series created in partnership with History.com and Rums of Puerto Rico, aims to leverage that deep connection to explore important events in world history through the eyes of Puerto Rican rum.

The island of Puerto Rico is arguably the Rum Capital of the World. Puerto Rico has been distilling rum for more than 450 years. That’s a lot of historical milestone celebrations!

With the Rum Times series, you’ll have a chance to go behind the scenes and inside celebrations of some of history’s most important achievements, like the quest for electric light, the invention of sports or the development of motion pictures.

Whenever you hear “It’s Rum Time!” you know you’ll be transported to one of Puerto Rico’s exciting local destinations or experience a historical event like never before. Take a look at the first episode, which explores the quest for electric light with Thomas Alva Edison and Nikola Tesla. You’ll be mesmerized and transported back in time to the beautiful island of Puerto Rico.

History in a way you’ve never experienced before: through the eyes of Puerto Rican rum, a local luxury that has been around for more than four centuries!

Personally, I love this innovative approach to telling historical stories. It humanizes historical figures by making them relatable. In a way that makes you want to have a drink with them, and get to know them better. Tesla seems like a rum and cola guy to me, heh!

For me, a rum and diet cola will never be the same again. The next time I take a sip, I’m going to close my eyes and travel to those gorgeous sandy beaches of Puerto Rico.

Be sure to check out It’s Rum Time and share your thoughts on this new series from the Rums of Puerto Rico and History.com. And tell me where your next Puerto Rican rum drink transports you. Cheers!

Visit Sponsors Site

Entrees

Mushroom Mini Turkey Meat Loaves Shaped Like Footballs?

It was the Saturday before the Super Bowl and I saw this new product from Campbell’s Soups at my local grocery. The mini meat loaves on the package looked exactly like footballs to me. Do you see the resemblance? Perfect for game day.

Campbell Soup For Easy Cooking

As an adult, I’ve grown to love a good onion soup. I usually only eat it when dining out, especially during my travels. The last truly great bowl of onion soup I’ve had was during a rainy weekend visit (my first time!) to Amsterdam. It was exactly what a tired, hungry traveler needed to recharge and explore a new city. It was like a big warm hug from the inside.

So I was excited to try this product on my traditional turkey meatloaf to give it a new twist. Sometimes making the “same old” meatloaf can be boring to make and to eat.

And I wanted to try to make some individual-sized turkey meat loaves, like the ones I saw on the package, to enjoy during the Super Bowl.  So I adapted my typical recipe (ground turkey, panko bread crumbs, egg and Italian seasoning) by pouring this soup on top, baking (and sometimes basting) until ready to eat.

mini meat loaves

This is how they looked coming fresh from the oven. Cute, huh! And quite scrumptious. All I needed to make this a near perfect home-style meal: a side of dirty mashed potatoes!

turkey meatloaf close up

Do you ever get inspired to “shape your food” into something different?


Soups, Salads & Sides

Chicken Sausage & Basmati Rice Soup

Disclosure: I was given an assortment of free Pereg® Natural Gourmet Food samples to review. I get no additional benefits for talking about this product or company. All opinions about this product are 100% my own.

Bone-chilling cold. Snow measured in feet, not inches. Polar vortexes and arctic blasts. Winter may be trying to beat us down with repeated, wickedly cold temperatures. But my secret weapon for warming up body and soul is a simple, hot bowl of soup. Except for the possibility of hot chocolate, nothing else satisfies and restores the way soup can.

And this weekend has been one of those times where a bowl of soup could surely work miracles and keep me hanging on to the hope that spring will….eventually…get here and melt away this misery.

I opened up my pantry and found two items from Pereg that I’ve been dying to try: a Basmati Rice with Vegetables and Texas Chili Heirloom Beans.

8-1356800114-0_3.jpg

I also grabbed some chicken broth and some chicken sausage links and headed to the stove. In a medium sauce pan, I heated up the entire container of broth (32 ounces) over high heat until it boiled. Then I added the Pereg Basmati Rice with Vegetables mixture and lowered the temperature to medium-high to let the ingredients simmer.

While it was cooking, I sliced the chicken sausage links and added them to the pot.  After about 15 minutes, I had this intoxicating Chicken Sausage & Basmati Rice Soup that was just about the best chicken soup I’ve ever made.  I had two bowls, with enough left over to freeze two single-serving containers so I had soup on hand for my next winter emergency.

chicken sausage rice soup closeup

I love making turkey chili in my slow cooker during the winter. The smell of the chili is comforting and part of my winter routine. But I’ve never made chili – or anything – with dried beans. So I carefully followed the directions on the Pereg Texas Chili Heirloom Beans package and soaked the beans over night.

Texas_Chili_Beans_10174950.jpg

Just look at these beautiful beans!

texas chili dried beans

After rinsing them, I substituted them for canned beans from one of my favorite Slow Cooker Chili recipes.

texas chili dried beans 2

The results were delish! I did learn that when you cook dried beans in a slow cooker, you have to cook them for at least 6 to 8 hours. Anything short of that, the beans will still be a little crunchy.

Disclosure: I was given an assortment of free Pereg® Natural Gourmet Food samples to review. I get no additional benefits for talking about this product or company. All opinions about this product are 100% my own.

Soups, Salads & Sides

Cheesy Rice and Corn Casserole

I love brown rice and corn. So when I found this recipe for a cheesy rice and corn casserole online at Minute® Rice’s website, I couldn’t resist.

When I first tried the recipe, I doubled the amount of cheese. I mean, you can never have too much cheese – right? Well, you can have too much cheese! It totally dominated the dish and made it hard to taste the corn and rice. Lesson: proportion of an ingredient is as important as the ingredient!

I ended up pairing this casserole as a side dish with some football-shaped mini turkey meat loaves as my pre-Super Bowl dinner. Touch down!

rice corn casserole

Cheesy Rice and Corn Casserole

Rating: 51

Yield: 6 servings

Ingredients

2 cups Minute Brown Rice, uncooked
2 cups low-sodium chicken broth
8 ounces chive and onion cream cheese
15 ounces corn with red, green bell peppers, drained
1 cup shredded Mexican-style four-cheese blend, divided
2 tablespoons chopped parsley

Instructions

Preheat oven to 375 F degrees. Spray a 1.5-quart baking dish with non-stick cooking spray. Set aside.

Prepare rice according to package directions using chicken broth for water. Mix rice, cream cheese, corn, 3/4 cup shredded cheese and parsley.

Pour mixture into prepared baking dish. Sprinkle with remaining shredded cheese. Bake 15 to 20 minutes, or until cheese on top is melted and lightly browned.

Notes

lightly adapted from recipe by Minute Rice

http://bakedchicago.com/cheesy-rice-corn-casserole/

Desserts

Celebrate National Cake Pop Day with Brownie Pops

brownie pops

It’s National Cake Pop Day and one of my favorite “cake on a stick” treats is a dressed up in sprinkles brownie pop!

Brownie pops are perfect for any casual party or celebration, especially with guests who are kids or adults who want something sweet in portion-controlled bites. The brownie pop makes it easy to enjoy a bite of a great dessert that satisfies the sweet tooth.

Dipped in chocolate and decorated with sprinkles, they are irresistible for kids and adults!

Cake pops

Brownie Pops

Cook Time: 22 minutes

Yield: 20 servings

Ingredients

1/2 cup and 1/4 cup butter, divided
2 ounces and 1 ounce unsweetened baking chocolate, divided
1 cup granulated sugar
3/4 cup all-purpose flour
2 eggs
1 teaspoon vanilla
1/4 teaspoon salt
1/2 cup confectioners' sugar
16 ounces almond bark (vanilla or chocolate-flavored)
40 lollipop sticks
nonpareils, jimmies and candies for decoration

Instructions

Preheat your oven to 350° F. Lightly grease an 8-inch square baking pan and set aside.

In a saucepan, combine 1/2 cup butter and 2 ounces of baking chocolate. Cook over medium heat, stirring constantly until melted. Remove from heat and set aside to cool slightly.

In a medium bowl, whisk together the granulated sugar, flour and salt. Pour in the almond bark mixture, and add the eggs and vanilla. Mix well.

Spread the batter evenly in the prepared baking pan. Bake for 22 minutes, or until the brownies begin to pull away from the sides of the pan. Cool pan completely, preferably on a wire rack.

Melt the remaining butter and baking chocolate in another saucepan over medium heat. Stir constantly until melted, and set aside.

Crumble the cooled brownies into a large bowl. Add the chocolate-butter mixture and confectioners' sugar and mix well.

Shape 1-inch balls with the crumbled brownie mixture. Place them on a parchment paper-lined rimmed baking sheet. Cover with plastic wrap and refrigerate until firm (at least 2 hours, but you may also refrigerate overnight).

Melt the almond bark according to package directions and keep warm. Remove one-third of the brownie balls from the refrigerator and insert the lollipop sticks. Dip the brownie balls into the melted almond bark coating. Swirl or tap off any excess. Press the coated brownie balls into your preferred decorations. I recommend using ramekins to hold each of the different decorations. At this point, you could also enlist the help of your birthday boy or girl to help with the decorating [yes, it's that easy].

Place the coated brownie pops onto parchment paper and let stand until the coating is set. Repeat with the remaining brownie pops until done. You can make these brownie pops up to one day before your event, but refrigerate any items in an airtight container.

http://bakedchicago.com/national-cake-pop-day/