Browsing Tag:

featured

Desserts

Asylum Brownies, with Pistachios, Walnuts and Almonds

asylum brownies with pistachios, walnuts and almonds

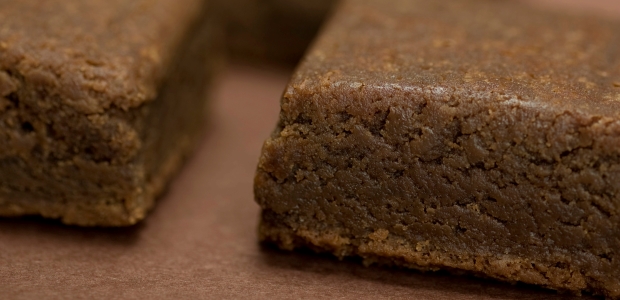
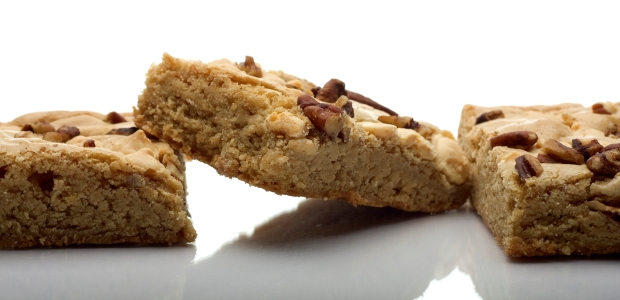
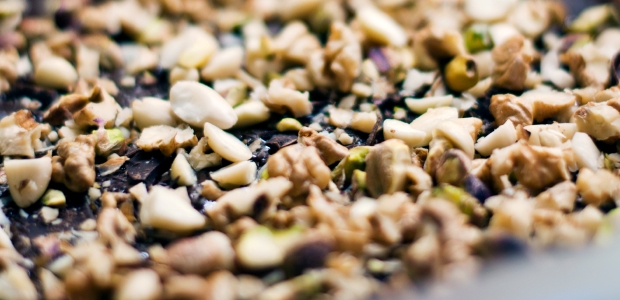
The lunatics are running the asylum in this brownie recipe featuring pistachios, walnuts and almonds. In honor of National Pistachio Day, I wanted to share this brownie recipe that is overrun with nuts – but the pistachios are (in my opinion) the star of the show.

Yes, I am a pistachio addict. It’s one of a few naturally green foods I love to eat! And because of this pistachio compulsion, I usually only stock pistachios still in the shells in my pantry so it slows down the consumption rate and gives my fingers some strength training. But when I’m ready to bake with pistachios, it’s always much easier to buy them already shelled.

With this nutty brownie recipe, you can easily substitute any of the nuts with your favorites or whatever you have in the pantry. In most cases, it’s best to use raw nuts (or peanuts) to avoid possible burning of the brownie tops. But if you closely watch the brownies while they’re baking, you could safely use roasted or dry roasted nuts (which is what I prefer to do for an earthier flavor and crunchier texture).
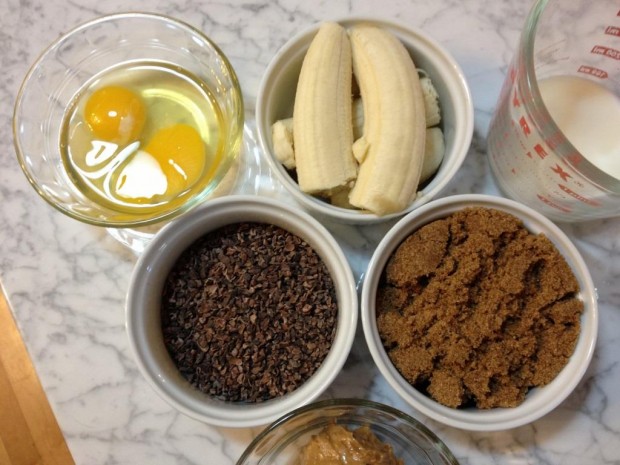
Asylum Brownies, with Pistachios, Walnuts and Almonds

Rating: 51

Cook Time: 25 minutes

Yield: 16 servings

Ingredients

1/2 cup unsweetened cocoa powder
1 cup granulated sugar
3/4 cup all-purpose flour
1/2 teaspoon baking powder
1 cup semisweet chocolate chips
1/4 cup and 1/4 cup pistachios, shelled and chopped, divided
1/4 cup and 1/4 cup almonds, chopped, divided
1/4 cup and 1/4 cup walnuts, shelled and chopped, divided
6 tablespoons butter, melted
1 egg
1/4 cup milk

Instructions

Preheat your oven to 350° F. Lightly grease the bottom of a 9×9-inch baking pan with butter or shortening.

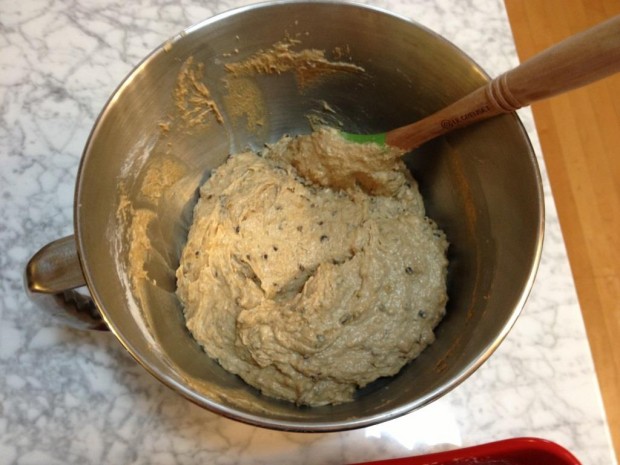
In a medium mixing bowl, combine the cocoa, sugar, flour, baking powder, chocolate chips and 1/4 cup each of pistachios, walnuts and almonds. Add the melted butter, milk and egg. Mix just until ingredients are blended.

Pour batter into your prepared baking pan. Using a spatula, level the batter in the pan. In a small mixing bowl, combine the remaining 1/4 cup each of pistachios, walnuts and almonds. Sprinkle the nut mixture evenly over the top of the brownie batter.

Bake for 25 minutes, or until toothpick inserted in center comes out clean. Let the brownies cool completely, about 1 hour. Cut into 4 rows by 4 rows to make 16 brownies.

http://bakedchicago.com/asylum-brownies-with-pistachios-walnuts-and-almonds/

Beverages

original irish coffee

cup of hot coffee

Happy National Irish Coffee Day! Who should we thank for the invention of Irish coffee? A quick-thinking chef at what is now the Shannon International Airport in Ireland and a group of weary American travelers. The story goes that a group of Americans had just arrived on a miserable winter night and chef Joe Sheridan added whiskey to their coffee to warm them up. The Americans asked if they had been served Brazilian coffee (as in coffee bean) and Sheridan told them it was “Irish coffee.”

Irish coffee has since become quite popular in America thanks to a travel writer for the San Francisco Chronicle who first enjoyed it at the Shannon International Airport. The basic recipe has evolved over the years, but I’m going to share with you my take (which adds a pinch of cinnamon) on the original recipe.

Irish Coffee

In a large mug, pour the black coffee about two-thirds full. Stir in the brown sugar until fully dissolved. Add the Irish whiskey, and give it a quick stir.

Using a teaspoon, carefully pour the thick cream over the back of the spoon held just above the surface of the coffee. You want the layer of cream to float on the coffee without mixing in it. Top it with a pinch of cinnamon.

Drink the coffee through the layer of cream. Sláinte!


Ingredients:

4 ounces freshly brewed black coffee
1 1/2 ounces Irish whiskey
1 teaspoon dark brown sugar
splash of thick, heavy cream
pinch of ground cinnamon


Number of servings: 1

Cooking time: 2 minutes

Entrees

Game Day Slow Cooker Sloppy Joes (with Bacon!)

slow cooker sloppy joes with bacon

America, are you ready for some football? Hosting a Super Bowl viewing party doesn’t have to be stressful, if you plan ahead. This DIY sloppy joes recipe is easy to make and can be prepared in larger batches to serve a crowd.

This recipe uses a slow cooker, which also allows you to keep the food warm and makes it easy for guests to serve themselves. But you can also stir this up in a single skillet in less than 20 minutes for a quick dinner idea. Either way, it’s sure to be a touchdown with your family and guests.

sloopy joes in the skillet

I use ground turkey instead of ground beef in my recipes, but you can use whichever you prefer. And for an added crunch, I’ve included crispy bacon as a last minute ingredient. The bacon adds a nice depth to the flavor, but remember that the longer it’s in the sloppy joes, the more it will lose its crunch. So I suggest adding in just a few minutes before you’re ready to begin serving.

Get your ingredients ready. 13 – 62 – 50 – Hike!

sloppy joes ingredients mise en place

Game Day Slow Cooker Sloppy Joes (with bacon!)

In a large skillet on medium-high heat, add the olive oil and minced onion. Add in the ground turkey and begin to cook until brown. Break up the ground turkey and stir often to ensure the onions are evenly cooked. When the ground turkey is no longer pink, transfer everything to a 3-quart slow cooker.

Stir in the chili sauce, brown sugar, relish, Worcestershire sauce, salt and pepper. Cover and cook on low heat for 3 hours. Stir occasionally to blend the flavors. About five minutes before you’re ready to begin serving, add in the crispy bacon and stir.

Spoon about 1/2 cup of sloppy joes mixture on a toasted bun. Toasting the buns will add another crunchy texture to each bite, plus keep the bun from getting soggy too quickly.


Ingredients:

1 tablespoon extra virgin olive oil
1 1/4 pounds ground turkey
1/2 cup fresh minced onion (or 1/4 cup dried)
12 ounces chili sauce
1/4 cup dark brown sugar
1/4 cup sweet pickle relist
1 tablespoon Worcestershire sauce
1 tablespoon kosher salt
1/8 teaspoon ground black pepper
1/2 cup crispy bacon, chopped (roughly 6 thick-cut or 8 regular-cut slices)
6 burger buns, split (toasted buns optional but recommended)


Number of servings: 6

Cooking time: 3 hours

Desserts/ DIY

homemade cherry pie filling

bing cherries

Happy National Pie Day! When it comes to pie, I’m a traditionalist. As a kid, I remember going to my aunt’s farm and climbing up the cherry tree. No, I wasn’t re-enacting any George Washington life story play. The tree was relatively short, and so was I. That made it easier for a kid to climb.

But coincidentally, my favorite pie is cherry. I’ve always been a bit suspicious of all the stuff they put into canned pie filling. Let’s face it: the deep red coloring and thickness are a bit unworldly.

So in honor of National Pie Day, I’m making some cherry mini pies using homemade cherry pie filling.

One of my four pugs, Bing.

Let’s set the record straight: My pug Bing is NOT named after the cherry NOR the search engine.

Homemade Cherry Pie Filling

In a large saucepan, combine the sugars, cornstarch and salt. Add the Bing cherries, water and lemon juice. Bring the mixture to a boil. Reduce the heat and let simmer for 10 minutes, stirring regularly until thickened. Remove from heat and let cool for 15 minutes.

Use this homemade cherry pie filling for making up to 8 mini pies (following manufacturer’s instructions for baking) or 1 regular pie.


Ingredients:

1/3 cup granulated sugar
1/2 cup dark brown sugar
1/4 cup cornstarch
1/4 teaspoon kosher salt
4 cups fresh Bing cherries, pitted
1 1/2 cups water
2 tablespoons lemon juice


Number of servings: 1 regular pie or 8 mini pies

Cooking time: 10 minutes

Desserts

Buttermilk Brownies

buttermilk brownies

I’ve never cared for the taste of buttermilk straight up from the bottle, but in a recipe it is an entirely different story. When I first started baking with buttermilk, I didn’t really know what buttermilk was. Buttermilk is essentially the liquid that remains after churning butter…the milk from the butter. It has a yogurt-y flavor and is thicker than regular milk, but not as thick as heavy cream. Most commercially made buttermilk is made by adding a lactic acid bacteria culture to pasteurized skim or non-fat milk (and may or may not have added butter flecks).

These buttermilk brownies call for a small amount of buttermilk, so if you don’t have buttermilk in stock and don’t want to purchase an entire bottle, then you have a few homemade options before you:

  1. Substitute for buttermilk: Pour 1 tablespoon of white vinegar or lemon juice in a liquid measuring cup. Then pour enough milk in the measuring cup to bring the liquid up to the 1 cup mark. Let stand for 5 minutes, then use as buttermilk replacement in your recipe.
  2. Make buttermilk at home: Pour 1 cup of heavy cream (avoid ultra-pasteurized) in a medium mixing bowl. Use an electric mixer to whip the cream until you have butter. Pour off the clear buttermilk liquid to use in your recipe. [If you want to use the butter, knead it under cold water for a couple of minutes to remove any residual buttermilk. Then store in your refrigerator until ready to use.]

Buttermilk Brownies

Cook Time: 35 minutes

Yield: 24 servings

Ingredients

2 cups all-purpose flour
2 cups granulated sugar
1 teaspoon baking soda
1/4 teaspoon salt
1 cup water
1 cup butter
1/3 cup unsweetened cocoa powder
2 eggs
1/2 cup buttermilk
1 1/2 teaspoons vanilla

Instructions

Preheat your oven to 350° F. Lightly grease the bottom of a 13x9-inch baking pan with butter or shortening.

In a medium bowl, combine the flour, sugar, baking soda and salt. Set aside.

In a medium saucepan, combine the water, butter and cocoa powder. Bring the mixture to a boil, stirring constantly. Remove the saucepan from heat. Add the cocoa mixture to the flour mixture. Beat with an electric mixer on medium speed until combined. Add in the eggs, buttermilk and vanilla. Beat for 1 minute.

Spread the buttermilk brownies batter in the prepared baking pan. Bake for 35 minutes, or until toothpick inserted in center comes out clean. Let the brownies cool completely, about 1 hour. Cut into 6 rows by 4 rows to make 24 brownies.

http://bakedchicago.com/buttermilk-brownies-2/

Desserts

Dark Chocolate Flourless Brownies

dark chocolate flourless brownies

I’ve always been surprised how little flour actually goes into most brownie recipes. Usually, the recipe calls from a half cup to a full cup of all-purpose flour. A little flour goes a very long way. And I was even more surprised when I first tried these dark chocolate flourless brownies because you almost can’t tell there’s no flour in them at all. They’re actually very moist and gooey and kind of melt in your mouth. If you have a favorite flourless baking recipe, I’d love you to share it with me and the readers of Baked Chicago.

Dark Chocolate Flourless Brownies

Preheat your oven to 350° F.  Lightly grease the bottom of an 8×8-inch square baking pan with butter or shortening.

In a medium bowl, whisk together the cocoa powder, baking soda and salt. Set aside.

In a large heatproof bowl, combine butter, sugar and dark chocolate. Place the bowl over simmering water in a saucepan. Stirring often, heat until the butter and chocolate are melted and the mixture is smooth. Remove from heat and whisk in the eggs, water and vanilla. Stir in the cocoa powder mixture; fold in the chocolate chips.

Spread the batter in the prepared baking pan. Bake for 40 to 55 minutes, or until a toothpick inserted in the center comes out clean. Cool completely, about 1 hour.

Lightly dust with powdered sugar and cut into 4 rows by 4 rows to make 16 dark chocolate flourless brownies.


Ingredients:

1/4 cup unsweetened cocoa powder
1/4 teaspoon baking soda
1/4 teaspoon salt
1 cup butter, cut into small pieces
1 1/4 cups granulated sugar
1 1/4 cups dark chocolate, chopped
4 eggs
1/2 cup cold water
1 teaspoon vanilla
1/3 cup semi-sweet chocolate chips


Number of servings: 16

Cooking time: 40 minutes

Breads

Peanut Butter Banana Bread with Roasted Cacao Nibs

peanut butter banana bread with roasted cacao nibs

This peanut butter banana bread with roasted cacao nibs is the latest experiment from my kitchen. I’d never used roasted cacao nibs before, so I was excited to create this recipe to see what kind of texture and flavor it would bring. Cacao nibs are bits of fermented, dried, roasted and crushed cacao bean. They have a nutty, chocolaty flavor, but aren’t sweet.

peanut butter banana bread ingredients

I wanted to do a riff on banana bread, adding in some crunchy peanut butter (one of my favorite ingredients) and roasted cacao nibs. But I was having some trouble finding cacao nibs in local grocery stores. So I found roasted cacao nibs online at The Spice House in Chicago. This is Chicago’s spice mecca. Their bricks-and-mortar store is so enticing, because each aisle is brimming with unique spice blends. It’s safer for my wallet to buy from their online store. [Yes, my name is Harvey and I’m a spice addict.] I’ve purchased their lavender vanilla sugar mix, double-strength vanilla, candied gingers and baking lavender there in the past, along with gifting to family and friends one of their most popular items: Ethnic Chicago Neighborhoods Spice Blends.

peanut butter banana bread raw dough

With banana as the primary canvas, I wanted to mix in ingredients that would add depth to the flavor. In this recipe, I used whole wheat flour – but you could substitute all-purpose flour, if you desire. And you could substitute granulated sugar instead of dark brown sugar.

peanut butter banana bread with roasted cacao nibs

Peanut Butter Banana Bread with Roasted Cacao Nibs

Cook Time: 1 hour

Yield: 10 servings

Peanut Butter Banana Bread with Roasted Cacao Nibs

Ingredients

2 cups whole wheat flour
1 teaspoon baking soda
1/2 teaspoon kosher salt
1/2 cup butter
1/2 cup crunchy peanut butter
1 cup dark brown sugar
2 eggs
1 cup mashed, ripe bananas (about 2 large or 3 small bananas)
1/3 cup milk
1 teaspoon lemon juice
1/2 cup roasted cacao nibs

Instructions

Preheat your oven to 350° F. Generously grease a 9-inch loaf pan and set aside.

In a small bowl, whisk together the flour, baking soda and kosher salt. Set aside.

In the bowl of an electric stand mixer fitted with a paddle attachment, cream the butter until it's light in color. Add the brown sugar and beat until fluffy. Add the eggs, one at a time, and mix just until combined. Then add the mashed bananas and peanut butter; blend thoroughly.

Add lemon juice to the milk. Don't worry if the milk curdles slightly. Alternate the addition of dry ingredients (in 3 parts) with the wet ingredients (in 2 parts). After each addition, mix only until the ingredients are blended.

Fold in the roasted cacao nibs by hand.

Pour the batter into the prepared baking pan. With a spatula, level off the batter to ensure even baking and rising.

Bake for 55 minutes or until the bread springs back when touched lightly in the middle. Do not over bake; the cacao nibs - which are already roasted - will have a tendency to burn if the bread is baked for too long. Cool in the pan on a wire rack for 15 minutes, then remove the peanut butter banana bread from the loaf.

http://bakedchicago.com/peanut-butter-banana-bread/


Desserts

Honeycrisp Apple Caramel Brownies

Honeycrisp apples in bowl

I just picked up at the store what might be my last batch of Honeycrisp apples for this season. I’ve been to Mariano’s, Jewel, Dominicks and Whole Foods and it seems everywhere that the only remnants are banged up and not up to my apple standards. So it looks like after I make this batch of Honeycrisp Apple Caramel Brownies that I’ll have to be patient until October when the next harvest hits. If you don’t have access to Honeycrisp apples where you live, you can substitute Granny Smith apples which are usually available year round everywhere.

Honeycrisp Apple Caramel Brownies

Preheat your oven to 350° F.  Lightly grease the bottom of a 9×9-inch baking pan with butter or shortening. Set aside.

In a medium bowl, stir together the flour, cinnamon, baking powder, salt and baking soda. Set aside.

In a separate bowl, use a mixer to beat together butter, sugar and egg (about 2 minutes). Fold in the apples and caramel candies by hand until combined. Add the flour mixture and stir until combined.

Spread the batter into the prepared baking pan. Sprinkle chopped peanuts on top. Bake for 40 minutes, or until golden brown and slightly firm. Cool completely, about 1 hour. Cut into 16 bars. [If you decide to serve warm, try this dessert a la mode with some quality French vanilla ice cream or gelato.]


Ingredients:

1/2 cup butter
1 egg
1 cup all-purpose flour
1 teaspoon ground cinnamon
1/2 teaspoon baking powder
2 3/4 cup Honeycrisp apples, cored, peeled and cut into 1/2-inch cubes (about 2 large apples)
30 soft caramel candies, unwrapped
1/4 teaspoon baking soda
1/2 teaspoon salt
1 cup granulated sugar
1 teaspoon vanilla
1/2 cup peanuts (salted and skinless), chopped


Number of servings: 16

Cooking time: 40 minutes

Award-Winning Recipes/ Desserts

Warm Brownie Pudding Cups

warm brownie pudding cups

Editori's Choice Stick a Fork In It Recipe WinnerAs a kid growing up in the 70’s, I remember begging my mom to make Jello® pudding…all the time. We were more likely to have Jello® gelatin (pudding’s less attractive sibling) for dessert, but that didn’t stop me from asking for butterscotch pudding (my favorite flavor then). Now as a grown up, I can have pudding whenever I want. That’s one of the rights given to Americans in the constitution, right!?! Be prepared, because when you make this warm brownie pudding cups recipe for family or friends, they’re going to start begging you to make it again and again. And how can you blame them?

[March 16, 2013 Update: This recipe was recognized as the winner of the Editor’s Choice Award in SplashPad Mobile’s 2013 “Stick a fork in it” recipe contest. Thank you, judges!]

Warm Brownie Pudding Cups

Cook Time: 30 minutes

Yield: 5 servings

Warm Brownie Pudding Cups

Ingredients

1/2 cup butter
1/2 cup all-purpose flour
1/2 teaspoon baking powder
pinch of salt
4 ounces semisweet chocolate, chopped
1/2 cup unsweetened cocoa powder
4 eggs, room temperature
1 teaspoon vanilla
1 cup granulated sugar
confectioners’ sugar for dusting

Instructions

Preheat your oven to 350° F. Spray five 8-ounce ramekins with non-stick cooking spray and set aside. Place a large baking pan half full of water in the oven to get warm.

In a medium heatproof bowl over a saucepan of simmering water, stir the semisweet chocolate and butter until almost melted and smooth. Remove from heat and let cool, stirring occasionally.

In a medium bowl, sift together twice the flour, baking powder, salt, and cocoa powder. Set aside.

In a separate medium bowl, beat the eggs and vanilla until light and foamy. Add in sugar and beat until fluffy. Stir in the chocolate mixture, and then fold in dry ingredients.

Pour the batter evenly among the prepared ramekins, filling each nearly to the rim. Place the ramekins in the baking pan. The water should come halfway up the sides of ramekins.

Bake for 30 minutes, or until the brownie pudding cups have risen to just above the rim and the tops are cracked. They should be firm to the touch. Let them cool for 5 minutes, and then dust with confectioners’ sugar. Serve the brownie pudding cups warm.

http://bakedchicago.com/warm-brownie-pudding-cups-2/

Desserts

Stout-glazed Brownies

stout glazed brownies

You don’t have to be Irish to appreciate these stout-glazed brownies. Whenever I hear the word “stout,” I immediately think of the adjective, which usually refers to a person who is (somewhat) fat or has a heavy build. Growing up, I was a “stout” child and I remember hating to go shopping for clothes. Almost nothing off-the-rack would fit me without some kind of alteration. I remember having to shop in the “husky boys” section for clothes. Husky typically means big and burly or strong. I don’t know if husky is better than stout when it comes to describing kids’ clothes. But I do know that I much prefer “stout” as a noun, which means a strong, dark beer brewed with roasted malt or barley. If a beer is a stout, it’s considered to have a strong or the strongest flavor.

There are several kinds of stout beers: dry (Irish), imperial (Russian), porter, milk, oatmeal, coffee, oyster and even chocolate! Chocolate and beer often makes for a great combination in recipes. These stout-glazed brownies will have you dancing an Irish jig with each bite.

Want to share these stout-glazed brownies with the kids? Here are some things to consider when baking or cooking with alcohol:

  • alcohol boils at 172° F, so almost any kind of baking or cooking with alcohol won’t leave any in the food once it’s done. It evaporates quickly. 
  • there’s not much alcohol in beer to begin with. It’s mostly water.
  • there’s not enough alcohol in beer for it to burn.

Bob’s your uncle!

Irish stout

Stout-Glazed Brownies

Preheat your oven to 350° F.  Lightly grease the bottom of a 9×9-inch baking pan with butter or shortening. In a medium saucepan, bring the stout to a boil and cook until reduced to 1/2 cup (about 10 minutes). Let cool and set aside.

In a medium heatproof bowl set on a small saucepan of simmering water, melt 12 ounces of dark chocolate and 1 cup butter. Stir constantly, until smooth. Remove from heat and cool slightly.

Whisk the sugar, eggs and vanilla in a large bowl. Gradually whisk in the chocolate mixture and 1/4 cup stout, reserving the remaining stout. Fold in the flour and 1 1/4 teaspoons salt.

Spread the batter in the prepared baking pan. Bake for 35 to 40 minutes, or until the brownies surface begins to crack. Toothpick inserted in the center should come out with moist crumbs. Cool for 20 minutes.

Stir the remaining 4 ounces of dark chocolate in a medium heatproof bowl, set on top of small saucepan of simmering water, until melted and smooth. Add the reserved 1/4 cup stout, remaining 2 tablespoons butter and remaining 1/4 teaspoon salt. Whisk until well blended.

Pour the warm glaze over the brownies. Let stand until glaze is set (about 40 minutes). Cut into 4 rows by 4 rows to make 16 stout-glazed brownies.


Ingredients:

1 cup stout
3/4 cup all-purpose flour
1 cup plus 2 tablespoons butter, divided
1 1/2 cups granulated sugar
3 eggs
1 teaspoon vanilla
12 ounces plus 4 ounces dark chocolate, chopped, divided
1 1/4 teaspoons and 1/4 teaspoon salt, divided


Number of servings: 16

Cooking time: 35 minutes

Desserts

White Chocolate Pecan Brownies

white chocolate pecan brownies

Is a brownie still a brownie if it has only white chocolate in its recipe? Some might call it a blondie, but isn’t that just a sub-category of the brownie family? Do you really care what you call it as long as it’s delicious and easy to make? No. So with that, I give you this white chocolate pecan brownies recipe to try for yourself. We’ll save the debate over “is white chocolate really chocolate at all?” for another time. Enjoy!

White Chocolate Pecan Brownies

Preheat your oven to 350° F.  Lightly grease the bottom of an 8×8-inch baking pan with butter or shortening.

In a small, heavy saucepan, combine 6 ounces white chocolate and butter. Cook over low heat, stirring until melted. Remove the white chocolate from heat and let cool for 10 minutes.

In a medium bowl, add eggs and sugar. Stir in white chocolate mixture with a spatula, just until combined. Add in the flour and vanilla, stirring just until smooth. Fold in the pecans.

Spread the pecan brownie batter in the prepared baking pan. Bake for 25 minutes, or until top is lightly golden. Immediately sprinkle the remaining 2 ounces of white chocolate over the brownies. As the white chocolate melts, use spatula to spread it over the pecan brownies.

Let the white chocolate pecan brownies cool completely, about 1 hour. Cut into 4 rows by 4 rows to make 16 brownies.


Ingredients:

6 tablespoons butter
2 eggs
1/4 cup granulated sugar
6 ounces plus 2 ounces white baking chocolate, chopped, divided
1 cup all-purpose flour
1/2 teaspoon vanilla
1/2 cup pecans, chopped


Number of servings: 16

Cooking time: 25 minutes

Breads

apple cinnamon bread

apple bread

This apple cinnamon bread recipe is great for the weekend. It’s perfect for a casual Sunday morning breakfast or brunch. Whip some honey into some room temperature butter for a decadent spread to enjoy on warm or toasted slices. Yum!

This recipe calls for Granny Smith apples, but you could also substitute (when in season) Honeycrisp apples for a very mellow, melt-in-your-mouth flavor experience.

Apple Cinnamon Bread

Preheat your oven to 350° F. Grease a 9-inch loaf pan and set aside.

In a large bowl, mix the flour, baking powder, cinnamon, baking soda and salt. In another bowl, beat the granulated sugar, sour cream, eggs and vanilla until well blended. Stir into the flour mixture, just until moistened. Fold in the apples.

Pour batter into the prepared loaf pan. Bake for 50 minutes, or until a toothpick inserted in the center comes out clean. Cool in the pan for 10 minutes, then remove the loaf and transfer to a wire rack to cool.

Cut in 1/2-inch slices, or preferred thickness.


Ingredients:

2 cups all-purpose flour
1 tablespoon ground cinnamon
2 teaspoons baking powder
1/2 teaspoon baking soda
1/2 teaspoon kosher salt
1 cup granulated sugar
1 cup sour cream
2 eggs
1 tablespoon vanilla
1 1/2 cups Granny Smith apples, peeled and chopped


Number of servings: 8

Cooking time: 50 minutes