All Posts By:

Harvey Morris

Breakfast

Rustic Tuscan Breakfast Tacos

BLENDABELLA Rustic Tuscan Breakfast Tacos

If you’re a loyal reader of Baked Chicago, you know I love discovering new products and creating original recipes. And when I get to create a recipe with a new product for the first time, it’s like opening a present on Christmas morning. Seriously. It’s that exciting to me to the recipe geek in me.

Recently BLENDABELLA invited me to participate in their Blogger Recipe Challenge. BLENDABELLA provided free samples of their Zesty Mexican, Coconut Thai and Rustic Tuscan blends to use in the recipe challenge, but all of the opinions in this post are my own.

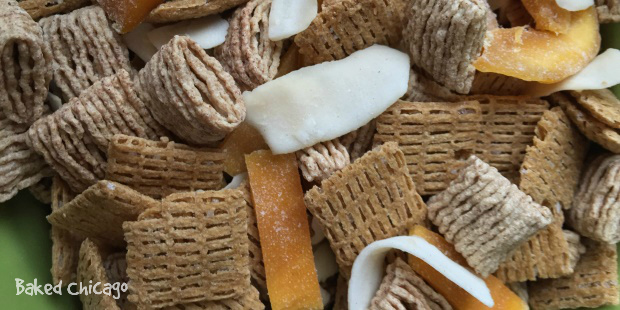
BLENDABELLA is a product that’s very much on trend with consumers’ increased use of mushrooms as a substitute for meat. Whether it’s for health or for being more sustainable with food choices, more and more people are using mushrooms (usually chopped and sliced) in recipes as a hearty substitute for ground meat. Mushrooms provide a similar umami flavor often associated with meat. Umami is the fifth basic taste after sweet, salty, bitter and sour; it’s derived from the Japanese word umai, meaning “delicious.” And unlike meat or most vegetables, mushrooms are resilient to being overcooked. [Check out this great post from America’s Test Kitchen on why mushrooms are known as the meat of the vegetable world and why it’s hard to overcook them.]

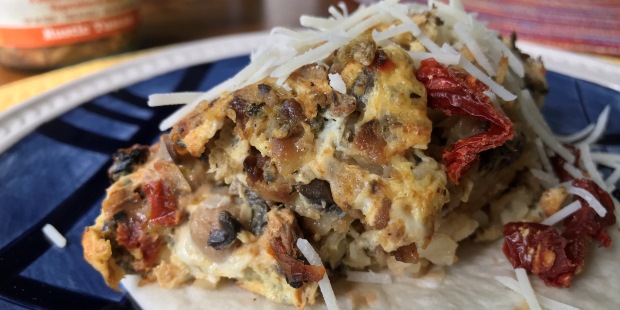
Personally, I love breakfast for any meal of the day so I decided to create an easy breakfast recipe with BLENDABELLA that would elevate my breakfast taco into something a little more special. With the jar of BLENDABELLA’s  Rustic Tuscan blend, I created my version of a Rustic Tuscan Breakfast Taco with ingredients I normally keep on-hand in my pantry.

BLENDABELLA Rustic Tuscan Breakfast Tacos

What I especially love about this recipe is its portability. In the photo you can see that I overfilled the tortilla for what was admittedly an open-faced taco. But you could easily reportion the stuffing to create a taco wrap that you can eat on the run whether that’s catching a bus or train or walking. And the colors of all the ingredients are stunning. A visual feast for the eyes.

BLENDABELLA Rustic Tuscan Breakfast Tacos

I usually cook any egg scrambles in larger quantities because whatever’s leftover still tastes great the next day. Happy Taco Tuesday, and Taco Wednesday….or Taco Friday! Every day is a great day for a delicious taco, right?

BLENDABELLA Rustic Tuscan Breakfast Tacos

For other recipe ideas for BLENDABELLA, follow them on Facebook, Twitter, Instagram and Pinterest. You can also purchase BLENDABELLA online here.

Rustic Tuscan Breakfast Tacos

Rustic Tuscan Breakfast Tacos

Ingredients

16 ounces frozen tater tots (approximately one-half bag)
6 heaping tablespoons BLENDABELLA Rustic Tuscan Blend
3 ounces sun-dried tomatoes, julienned
2.25 ounces black olives, sliced
6 large eggs
2 ounces milk
2 tablespoons Italian blend seasoning
3 ounces shredded Romano cheese
6 soft mini flour tortillas
canola oil for browning tater tots

Instructions

In a large skillet, warm up the canola oil over medium high heat. Pour in the tater tots, cooking for 5 minutes before stirring and cooking for another 4 minutes to brown evenly.

Add the BLENDABELLA Rustic Tuscan blend along with sun-dried tomatoes and sliced black olives. Stir to blend.

In a small bowl, whisk eggs, milk and Italian seasoning together. Then pour egg mixture into skillet. Stir occasionally until eggs are completely cooked to your preference of doneness.

On individual microwave-safe plates, heat up flour tortillas according to package directions. Spoon egg mixture into center of tortillas. Then top with a generous portion of shredded Romano cheese. Wrap up your taco and enjoy.

http://bakedchicago.com/rustic-tuscan-breakfast-tacos/

Desserts

Rustic Honeycrisp Apple & Cranberry Crisp Drizzled with Salted Caramel

One of my favorite things about the fall season is the abundance of apples. Specifically, Honeycrisp apples. If you’ve never had one, do your palate a favor and try one ASAP. Honeycrisp apples are juicy, light and delicately sweet. In a word, refreshing.

Apple crisp is a go-to fall dessert but I wanted to change things up just a bit and pair the sweetness of the Honeycrisp with the tartness of a cranberry. Cranberries are really versatile and worthy of being on any menu year round.

Normally, I would peel apples for a pie or dessert. But I was feeling adventurous and decided to leave the skin on to see if it would add a layer of flavor. To be honest, the apple slices were so thin that by the time the dish came out of the oven I couldn’t tell the peels were left on. So while it didn’t add to the flavor profile, it did save me a lot of prep time to skip the peeling process. Still a win!

Do you have a favorite kind of apple to bake with? I’d love any recommendations on what I should bake with next. Until then remember to bake like you mean it!

Rustic Honeycrisp Apple & Cranberry Crisp with Salted Caramel

Rating: 51

Ingredients

Filling
3 medium Honeycrisp apples, cored and sliced
2 cups cranberries
1 cup sugar
3 tablespoons all-purpose flour
1 tablespoon corn starch
1 tablespoon ground cinnamon
1 teaspoon ground nutmeg
Topping
1 1/2 cups instant oats
1/2 cup all-purpose flour
1/2 cup dark brown sugar
1/2 cup butter, melted
4 tablespoons salted caramel (optional)

Instructions

Preheat oven to 375 degrees Fahrenheit. Butter or use non-stick spray an 8 x 8 baking dish.

In large bowl, combine apple slices, cranberries, sugar, cinnamon, corn starch, flour and nutmeg until well coated. Fill the baking dish.

In a medium bowl, mix the topping ingredients (except salted caramel) until crumbly. Sprinkle evenly over fruit mixture. If using salted caramel, drizzle over top of crumble.

Bake for 45 - 55 minutes, or until fruit is tender. Cool at least 20 - 30 minutes before serving. Refrigerate any uneaten portion for up to several days, covered with air-tight wrapping.

Notes

I call this a rustic apple crisp, in part because I left the apple peel on the apples. If you prefer to peel that apples, that works too. But I've found you really don't notice the peel if you slice the apple thinly. And it's much easier prep!

http://bakedchicago.com/rustic-honeycrisp-apple-cranberry-crisp/

Soups, Salads & Sides

Roasted Asparagus & Cranberry Salad

Roasted Asparagus & Cranberry Salad

I was invited to participate in a blogger recipe challenge by Cape Cod Select Premium Cranberries. The challenge was to create an original recipe (drink, appetizer, side, salsa or salad) using cranberries as a featured ingredient. Cape Code Select graciously provided two large bags of their premium frozen cranberries for the recipes, but all of the opinions in this post are my own.

For many Americans, cranberries evoke nostalgia for Thanksgiving. But I enjoy the tart flavor of cranberry nearly every day in my low-calorie cran-raspberry drink. I find most standard juices too sweet to drink, so I appreciate the balance of sweet and tart that cranberry can offer. The same is true in almost any dish when cranberries are used to provide a tart, sweet balance to the other ingredients.

I decided to create a warm salad recipe that you could serve any night of the week: Roasted Asparagus & Cranberry Salad. What I really like about this recipe is there are only a few ingredients and it takes less than 5 minutes to prep the food before you pop it into the oven. Don’t the colors sing!?! The green of the firm asparagus stalks. The bright red of the cranberries. And this is before you cook the dish!

Depending on your heat source, I recommend turning the asparagus and cranberries a midway through the cooking time to ensure even cooking. You could also adapt this recipe for the grill by using a grill-safe pan or aluminum foil to hold the ingredients.

When the dish is out of the oven, you can drizzle it with the reserved garlic oil and lemon juice. Then zest a lemon on top and sprinkle with shaved Parmesan and chopped pistachios. And voila! You’ve got a vibrant side dish that everyone will love.

Even up close, the dish invites you in to explore all the layers of texture. The crunch of the pistachio and cranberry. The smoothness of the Parmesan.

Here’s the glamour shot. Are you ready to sink your teeth into a sizzling salad?

With the remaining cranberries, I’m going to try next a Cranberry-Apple Crisp. Apple and cranberry balance each other so well. I have to say I was very impressed with the product quality of the Cape Cod Select Premium Cranberries, which are non-GMO verified. And I was extremely pleased to discover that Cape Cod Select is a women-owned business run by the Rhodes family. The Rhodes family has been growing cranberries on their 800-acre farm in Massachusetts for more than 75 years with a focus on sustainability.

Here’s a locator to find where to buy Cape Code Select frozen cranberries near you. Or you can order frozen cranberries from Cape Cod Select online. For more cranberry recipe ideas that you can use now and throughout the fall, follow Cape Code Select on Facebook, Instagram, Twitter and Pinterest.

Roasted Asparagus & Cranberry Salad

Rating: 51

20 minutes

Yield: 4 servings

Roasted Asparagus & Cranberry Salad

Ingredients

3 T extra virgin olive oil
1 clove garlic, minced
1 cup cranberries
3/4 lb medium asparagus, trimmed
1 large lemon for zest and juice
2 T toasted pistachios, chopped
1 T shaved Parmesan cheese
fresh ground black pepper for seasoning

Instructions

Preheat your oven to 425 degrees F.

In a large bowl, whisk together the olive oil and garlic. Reserve 1 tablespoon of the mixture for later use.

Toss the asparagus and cranberries in the garlic oil mixture to coat. Place asparagus and cranberries on a roasting pan. Season lightly with black pepper.

Roast for 10 - 15 minutes, turning occasionally. When done, transfer to a platter. Drizzle with the reserve garlic oil and lemon juice.

Top with lemon zest, Parmesan and pistachios. Serve immediately.

http://bakedchicago.com/roasted-asparagus-cranberry-salad/

Desserts

Caramel Blondie Bars

Caramel Blondie Bars with Hershey's LANCASTER Soft Caramel Cremes

Caramel Blondie Bars

Ingredients

  • 20 LANCASTER Caramel Soft Cremes, cut and quartered
  • 1 tablespoon plus 1 1/4 cups all-purpose flour, divided
  • 6 tablespoons butter, room tempterature
  • 3/4 cup packed dark brown sugar
  • 1 egg
  • 1 tablespoon milk
  • 1 teaspoon vanilla extract
  • 1/2 teaspoon baking soda
  • 1/8 teaspoon sea salt

Directions

Preheat your oven to 350 F degrees. Line an 8-inch square baking pan with parchment paper. Spray with non-stick spray to ensure easy removal. Set aside.

Remove the wrappers from caramel candies. Cut each caramel into quarters. Toss the caramel pieces with 1 tablespoon flour to keep the pieces from sticking together.

LANCASTER Caramel Cremes cut into quarters

Beat the butter and brown sugar in a large bowl until fluffy. Add the egg, milk, and vanilla. Beat well.

In a medium bowl, stir together the remaining flour, baking soda and salt. Add the dry mixture to the web mixture. Beat until well blended. Fold in the caramel pieces.

Spread the batter into your prepared baking pan. Using a spatula, ensure the batter is evenly spread in the pan.

Bake for 25 to 30 minutes, or until lightly browned.

Caramel Blondie Bars fresh from the oven

Cool in the pan for 15 minutes, then remove and cool completely on a wire rack. Cut into 16 bars.

Caramel Blondie Bars cut into 16 bars

Entrees

Buffalo Chicken Fried Rice. Let’s Get Cooking!

Summertime. BBQ. Beer. Competition. These are the ingredients that led up to my latest recipe creation: Buffalo Chicken Fried Rice.

I was invited to participate in the Budweiser Sauces Ultimate Blogger Recipe Challenge. The challenge was to create an original recipe using at least one Budweiser Brewmaster’s Premium Sauces or Marinades. Budweiser graciously provided a sampling of their BBQ Sauces, Steak & Burger Sauce and Marinades for the competition, but all of the opinions in this post are my own.

The samples included their Steak & Burger Sauce, which I tried with my tried-and-true turkey burger (my go-to summer grilling option). The sauce packed a kick, and I found it was great with vegetables, too.

They also included a sample of their flavored BBQ Sauces, including Bold & Spice, Sweet & Smoky and Classic flavors. I used the Sweet & Smoky BBQ Sauce as a glaze for roasted new potatoes and baby carrots, and loved the smoky flavor it added to an easy side dish I’d serve at any backyard gathering or take to a potluck.

I have to be honest. When it came to the sample of the Buffalo Chicken Marinade, I wasn’t sure if I would even try it. I’ve never had Buffalo chicken wings because I HATE chicken wings. Yes, I’m a pretty pick eater when it comes to chicken and only like chicken breast.

But as a grown-ass adult, I was also a bit embarrassed that I’ve NEVER had Buffalo chicken wings. So I decided that Buffalo Chicken Marinade was going to be the product I focused on for creating my entry into the Budweiser Sauces Ultimate Blogger Recipe Challenge. But it would have to be on my terms.

Chicken Fried Rice, Re-Envisioned

I love a good chicken fried rice, but I have to admit that I rarely cook that at home. When I lived in San Francisco, it was so easy to find a great Chinese take-out restaurant that I got spoiled. Now that I’m living in a small town in the suburbs of Chicago, there aren’t a lot of good options for authentic Chinese fried rice nearby.

So I decided to try adding the flavor of Buffalo chicken wings to my version of a basic fried rice recipe. I gathered some of my favorite vegetables: sliced black olives, julienned sun-dried tomatoes, shelled edamame, corn niblets and diced carrots.

Buffalo chicken fried rice

Using the Budweiser Marinade was pretty simple. I cut up 2 large chicken breasts (skinned and deboned from the supermarket) into 2″ cubes. Admittedly, that’s a large cube of chicken. But I wanted the chicken to retain the flavor of the marinade. If you cut it up too small, you minimize the flavor. And I found the size of the chicken cubes ended up making the difference in having a balanced dish. The blast of flavor of the Buffalo Chicken Marinade was a great contrast to the fried rice and vegetables.

The instructions suggest a minimum of 6 hours to marinade, but recommend overnight — which I did for this recipe. The packaging is very sturdy and after the marinade process was done, you just throw it away. Nothing to clean up. Now that’s what I like!

Buffalo Chicken Fried Rice Deliciosity

Buffalo chicken fried rice

Before trying this recipe, I’d never tasted Buffalo Chicken in any format. What was I thinking? The end result was way better than I imagined it would be. And that’s because I decided to try something new and to do it on my own terms. I still don’t like chicken wings, so that hasn’t changed. But I now know that I love Buffalo chicken flavor. It really turned what would have been plain chicken breast cubes into a flavor-packed star ingredient.

Not to be sappy, but that’s kind of a metaphor for how we all should approach life. Don’t write something off if you’ve never tried it. And don’t be afraid to try something on your own terms. That’s how you learn and grow.

Buffalo Chicken Fried Rice

If you like trying something new, I hope you’ll try this recipe, too. And let me know how you change it up to make it your own. And I invite you to check out some of my other award-winning recipes here, including Sweet-Potato Bacon Biscuits.

You can learn about Budweiser BBQ Sauces and Marinades at their website, or by following them on Facebook, Twitter and Instagram.

To see recipes from the other competing bloggers, follow hashtags #BudweiserSauce, #BudweiserBBQSauce and #KingOfSauces on social media. Let us know what you think of our creations!

Until next time, grill on. Yass!

Buffalo Chicken Fried Rice

Yield: 6 to 8 servings

Buffalo Chicken Fried Rice

Ingredients

2 large chicken breasts, skinned and deboned, cut into 2" cubes
1 Budweiser Brewmaster's Premium Buffalo Chicken Marinade (available at Walmart, H-E-B and Hy-Vee)
6 tablespoons canola oil, divided
2 tablespoons minced garlic
2 tablespoons minced ginger
2 ounces sun-dried tomatoes, julienned
14 ounces edamame, shelled
2.25 ounces black olives, sliced
15.25 ounces corn, drain
1/2 cup carrots, diced small
4 cups cooked brown rice, cooled
2 eggs, lightly beaten
1/4 cup water
2 tablespoons sesame oil
3 tablespoons soy sauce
salt and pepper to taste

Instructions

Marinade the cubed chicken breast, per instructions, in the Budweiser Brewmaster's Premium Buffalo Chicken Marinade overnight in the refrigerator.

In a medium non-stick skillet, put 2 tablespoon oil and turn heat on high. Add marinaded chicken to the skillet and cook until nicely browned (approximately 10 - 12 minutes). Stir occasionally. When done, remove from heat source and set to the side while cooking the vegetables.

In a large non-stick skillet, put 2 tablespoons oil as well as the garlic and ginger. Cook over high heat for about 30 seconds before adding edamame, black olives, corn, carrots, and sun-dried tomatoes. Cook for 4-5 minutes, stirring frequently. When done, put vegetables in skillet with marinaded, cooked chicken.

In the newly emptied large skillet, add the remaining oil. Then add the rice a bit at a time so you can break up any clumps. The goal is to coat the rice. Stir for a few minutes to evenly fry the rice, then make a well in the center. Add the beaten eggs in the well. Scramble the eggs before fully incorporating them into the rice.

Return the chicken and vegetables to the large skillet and stir to incorporate. Add water, stirring, for about one minute to allow the steam to penetrate the entire mixture. Add soy sauce and sesame oil, then salt and pepper (if necessary) to taste.

Turn off heat and serve.

http://bakedchicago.com/buffalo-chicken-fried-rice-lets-get-cooking-yass/

Entrees

Arrabbiata Sauce with Rotini Pasta and Turkey Meatballs

arrabbiata sauce I must admit for most of my adult life I’ve never made spaghetti sauce from scratch. With so many good pre-made sauces on the market, I usually stock up when there’s a sale and (occasionally) doctor it up with some fresh herbs or tomatoes. Can I get an “amen?” Browsing through one of my favorite slow cooker cookbooks – Better Homes and Gardens Year-Round Slow Cooker Recipes – I found a recipe for arrabbiata sauce. I was intrigued because I’d never heard of arrabbiata sauce. After a little research, I discovered that “arrabbiata” is Italian for “angry.” The sauce gets its name from the burn of the crushed red peppers. Most everything about this recipe sounded great, but of course I had to add my own twists to make it more of something I’d want to eat. So I exchanged pancetta for bacon and I added a cup of Cabernet Sauvignon wine to the recipe. I thought if the sauce was going to be “angry,” then being a little “boozy” couldn’t hurt!

Arrabbiata Sauce with Turkey Meatballs

arrabbiata sauce_4 The arrabbiata sauce is extremely easy to make. Your slow cooker does most of the heavy lifting. To start the recipe, I browned the onion, bacon and garlic in a skillet – then transferred the contents to my slow cooker. You add all the rest of the ingredients (except for the pasta and meatballs – those come later!) into your slow cooker and give it a good stir. Set it on HIGH and put on the lid. Walk away for 4 to 5 hours and the sauce will be “perfetto!” arrabbiata sauce_2 About 45 minutes before your arrabbiata sauce is done, you’ll want to start making the turkey meatballs. I used pre-seasoned panko breadcrumbs with Italian seasoning spices, but you can use standard panko breadcrumbs and add in the Italian seasoning by hand. The mixture of the panko, butter and egg help bind the ingredients, and make for a great carmelized “crust” on the outside of the meatballs. I tend to like larger meatballs, so that requires even cooking. The trick is not to rush the browning process, so never go higher than medium-high heat. I don’t make homemade meatballs that often. Usually, I’ll just brown ground turkey into my sauce and make whatever sauce I’m using a meat sauce. But these turkey meatballs were to die for! Well worth the effort. You may want to make a double batch; they freeze well. arrabbiata sauce_6 
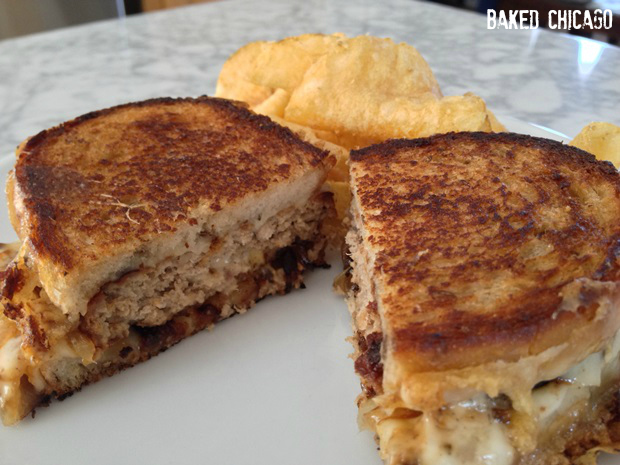
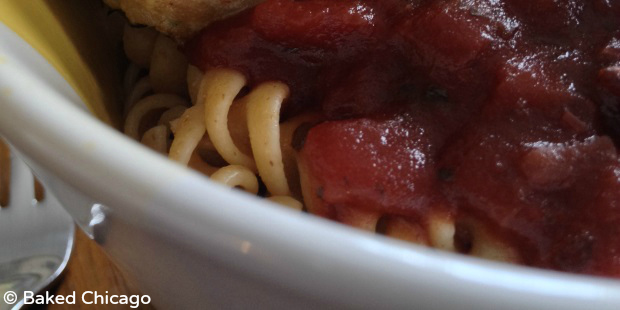
Cook your pasta according to package directions. I used rotini pasta, but you can easily substitute your favorite pasta or what you have in your pantry. If you’re only having pasta for a meal, I like to use a bowl. It makes it easier to cover the pasta with sauce, without wasting a lot covering the entire length of a plate. Then pile on the meatballs and pour a healthy serving of arrabbiata sauce over it all. Top it with shredded Parmesan cheese and you’ve got a great weekday dinner or weekend lunch that’s good enough for company. arrabbiata sauce_3 I ended up adding Cabernet Sauvignon to this arrabbiata sauce recipe to make it “less angry.” What’s your favorite ingredient to add to spaghetti sauce?

Arrabbiata Sauce with Turkey Meatballs

Rating: 51

Cook Time: 4 hours

Yield: 8 servings

Ingredients

For Sauce:
1 large onion, chopped
5 slices thick-cut bacon, chopped
3 cloves garlic, minced
56 ounces diced tomatoes with basil, garlic and oregano, undrained
15 ounces tomato sauce
2 teaspoons dried parsley
1 teaspoon dried oregano, crushed
1/2 teaspoon sea salt
1/2 teaspoon dried basil, crushed
1/2 teaspoon crushed red pepper
1 cup Cabernet Sauvignon, or any dry red wine
8 servings cooked rotini pasta
1/4 cup shredded Parmesan cheese
For Meatballs:
1 cup panko breadcrumbs
20 ounces ground turkey, 93% lean
1 tablespoon Italian seasoning
1 tablespoon dried parsley
2 medium onions, minced
2 eggs
1 tablespoon butter, room temperature
1 teaspoon sea salt
1 teaspoon ground black pepper

Instructions

For Sauce:

In a skillet, cook the onion, bacon and garlic over medium heat until onion is tender and bacon is browned.

Transfer mixture to a 5-quart slow cooker. Set skillet aside to use when cooking meatballs later.

Stir in the tomatoes, tomato sauce, parsley, oregano, basil, salt, and crushed red pepper. Cover and cook on HIGH for 4 hours (or on LOW for 8 to 10 hours).

Serve over pasta and turkey meatballs. Sprinkle each serving with Parmesan cheese, if desired.

For Meatballs:

In a large bowl, thoroughly combine ground turkey, breadcrumbs, Italian seasoning, dried parsley, mined onions, eggs, butter, salt and pepper.

By hand, form golf ball-sized meatballs and place in cooled skillet (used when browning onion and bacon mixture earlier). Makes about 16 meatballs, or 2 per serving. Feel free to make your meatballs smaller or larger, based on your preference. But make all meatballs uniform in size so they cook evenly.

Place skillet with meatballs on burner at medium-high heat. Every 5 minutes or so, turn meatballs so that all sides will eventually brown and meatballs will be evenly cooked. Watch carefully and remove meatballs from skillet when done. Set aside to serve with arrabbiata sauce and pasta.

Notes

Sauce portion of this recipe lightly adapted from Better Homes & Gardens "Year-Round Slow Cooker Recipes"

http://bakedchicago.com/arrabbiata-sauce-recipe/

Desserts

Bing Cherry & Chocolate Chip Olive Oil Cake

Rum-infused Bing Cherry Chocolate Chip Olive Oil Cake_4
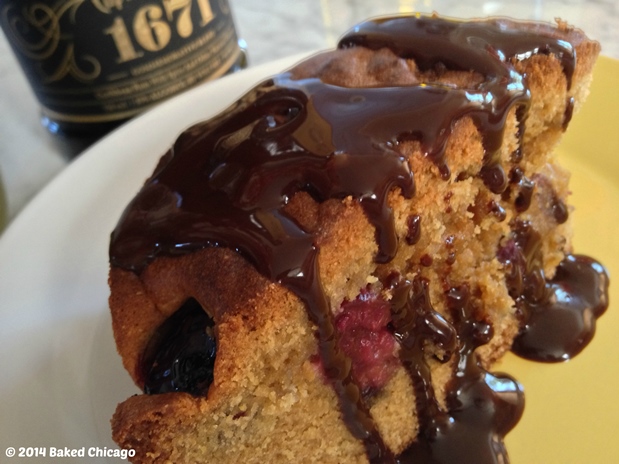
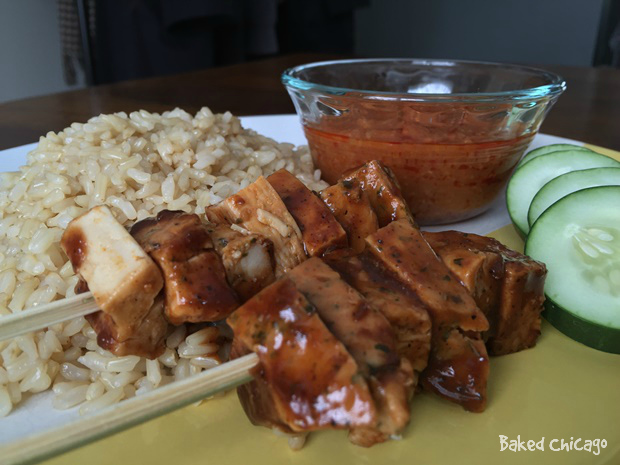
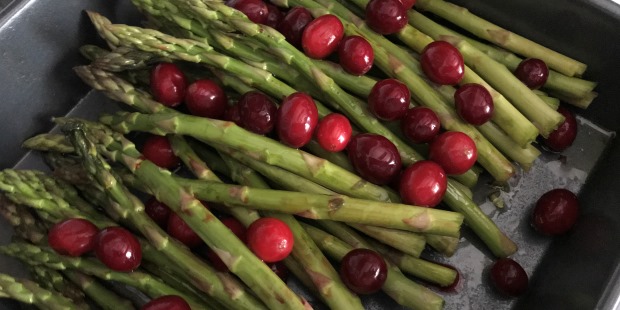
I decided to macerate the Bing cherries in some Captain Morgan® 1671 rum. This Caribbean rum has aromas of sweet oak and dark fruit – with hints of chocolate. That makes it perfect for this olive oil cake with Bing cherries and dark chocolate chips. Rum-infused Bing Cherry Chocolate Chip Olive Oil Cake_2 Macerating is just like marinating. I took a canning jar and filled it with pitted Bing cherries. Then I topped it off with Captain Morgan 1671 Rum. I let cherries soak for a few hours, but you could also let it soak overnight in the refrigerator. Just don’t throw out the rum after the cherries are done macerating! By itself it makes for a nice sipping companion while you’re baking – or a great addition to an ice cold Diet Coke. Rum-infused Bing Cherry Chocolate Chip Olive Oil Cake_1 This batter is quite thick, so use a sturdy spatula or spoon when you start to incorporate the chocolate chips. You could also mix the Bing cherries into the batter, but I prefer to layer them evenly on the batter to ensure nearly every bite of this rich cake has a burst of rum-infused cherry in it.

Rum-infused Bing Cherry Chocolate Chip Olive Oil Cake_3 
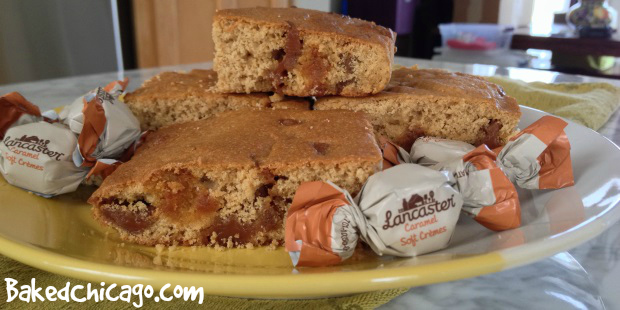
I like to serve this cake while it’s still warm. The chocolate, cherries and rum make for a seriously decadent flavor combination. Fresh Bing cherries and Caribbean spiced rum. Now that’s what summer should taste like! Rum-infused Bing Cherry Chocolate Chip Olive Oil Cake_hero_a

Rum-infused Bing Cherry & Chocolate Chip Olive Oil Cake

Rating: 51

Yield: 12 servings

Rum-infused Bing Cherry & Chocolate Chip Olive Oil Cake

Ingredients

3 large eggs
1 1/2 cups dark brown sugar
1 tablespoon vanilla extract
3/4 cup extra-virgin olive oil
grated zest and juice of 1 lemon
3 cups all-purpose flour
3/4 teaspoon baking powder
3/4 teaspoon sea salt
1/3 cup cornmeal
1 and 1/2 cups dark chocolate chips, divided
2 1/2 cups fresh Bing cherries, pitted

Instructions

In a resealable container, soak Bing cherries in 1 cup of rum. Let cherries macerate for at least a few hours, and up to 24 hours.

Preheat your oven to 350 F degrees. Lightly coat a 9" round cake pan with butter; set aside.

In a large mixing bowl, whisk together eggs and brown sugar for a few minutes, letting air incorporate into the mixture. Add vanilla, olive oil, lemon zest and lemon juice.

In a medium mixing bowl, stir together flour, cornmeal, baking powder and salt. Add dry mixture to the wet mixture. Mix until combined; batter will be thick. With a spatula, stir in 1 cup chocolate chips.

Pour half of the batter into your prepared baking pan. Spread about 2 cups of cherries evenly. Save 1/2 cup of macerated cherries for a garnish. Spoon remaining batter over cherries; it's okay if the fruit peeks through the batter.

Bake until lightly golden brown and a toothpick inserted comes out clean, about 35 to 40 minutes in a convection oven. If you use a non-convection oven, baking time will take a bit longer.

Remove from oven and let cool on a wire rack for 10 minutes. Remove cake from cake pan and let cool completely on a wire rack.

Cut cake and serve with reserved Bing cherries as garnish. Put remaining chocolate chips in microwave-safe bowl; heat on HIGH for 60 to 90 seconds or until melting process has just started. Remove from microwave and stir with teaspoon until completely melted. Drizzle warm chocolate over slices and Bing cherry garnish; serve immediately.

http://bakedchicago.com/bing-cherry-chocolate-chip-olive-oil-cake-recipe/

Desserts

Chicago Mix Brownie Cookies

I am excited to share a recipe for brownie cookies that I’ve “jacked up” with some Garrett’s Cheddar cheese and Caramel Crisp popcorn (formerly known as the Chicago Mix)!

IMG_4012

My advice: buy a larger bag than what you need for the recipe. If you’re like me, half of it will be gone by the time you start baking in the kitchen. It’s hard to resist Garrett Popcorn!

IMG_4048

The contrast of savory Cheddar cheese and sweet Caramel Crisp popcorn is genius on its own. But wrapped inside a brownie cookie takes it to a whole other level of decadence and goodness.

Chicago Mix brownie cookies


Chicago Mix Brownie Cookies

Rating: 51

Cook Time: 16 minutes

Yield: 2 dozen cookies

Ingredients

12 ounces bittersweet chocolate chips (about 2 cups)
1/2 cup all-purpose flour
1/4 teaspoon baking powder
1/4 teaspoon sea salt
6 tablespoons butter, room temperature
1 cup brown sugar
3 eggs
1 teaspoon vanilla extract
4 cups Garrett Popcorn Chicago Mix flavor

Instructions

Preheat oven to 350° F. Line a baking sheet with parchment paper; set aside.

In a microwave-safe bowl, heat the chocolate chips on high for about two minutes. Stir with a spatula to facilitate the melting process. Continue heating in microwave in additional 30-second intervals, and stirring after each interval. Be careful not to burn the chocolate. Stirring after each interval will ensure the chocolate melts evenly and the chocolate will continue to melt while you are stirring. Stir until completely melted; set aside and let cool.

In a small bowl, stir together flour, baking powder and salt. Set aside.

In a large bowl (or mixing bowl of a stand mixer), beat together butter and brown sugar (about two minutes on medium speed). Add eggs and vanilla, beating until combined.

With mixer on low speed, alternately beat in chocolate and flour mixtures. Mix just until combined. Fold in the Chicago Mix popcorn. The dough will be very thick and the popcorn will begin to breakdown in the batter.

Drop dough by heaping tablespoons, two inches apart, onto the prepared baking sheet. Bake for 12 to 16 minutes. Remove from oven and let sit for two minutes before transferring to wire rack to cool completely.

http://bakedchicago.com/chicago-mix-brownie-cookies-recipe/

Breakfast/ Snacks & Candies

American Pie Trail Mix

One of my go-to crunchy snacks is my “American Pie” Trail Mix. It’s got only four ingredients and you won’t believe how easy it is to make (in under 2 minutes!). I call it “American Pie” Trail Mix because it beautifully blends the flavors of warm cinnamon, tart apples, tangy cherries, and sweet maple-brown sugar.

Quaker_American Pie Trail Mix_redwhiteblue

American Pie Trail Mix

Ingredients:

Directions:

Gather and measure your ingredients.

Quaker_mise en place

Pour ingredients into a resealable plastic food bag.

Quaker Trail Mix_shake

Seal the bag and shake it up for a few seconds until all the ingredients are blended. This can also be a great burst of cardio activity and a stress release!

Then I put some of the trail mix in two smaller snack-sized bags for the car, and keep the remaining trail mix sealed in the bag in a cool, dry place. I commute about 3 hours a day, on average, and the drive home during rush hour can be brutal. Not only am I fighting the traffic but I’m fighting the hunger beast. Having a small nosh in the car that’s a better alternative to chips or chocolate means I can tame the hunger beast and avoid over-indulging when I get home.

Quaker Squares with Honeycrisp Apple


Entrees

Malaysian Black Pepper Chicken Satay

Malaysian cuisine is often considered exotic, colorful and tempting because of its a unique blend of Malay, Chinese and Indian food traditions with Indonesian, Thai, Portuguese and Middle Eastern influences. Quality spices have been at the center of Malaysian cooking for centuries, dating back to when Malaysia became a major crossroad for the ancient eastern spice trade route. Cross-cultural borrowing among the Malays, Chinese and Indians has created a number of dishes that are uniquely Malaysian.

Rice (nasi in Malay) is eaten at most meals and a staple food found in every Malaysian kitchen. Typically, plain rice accompanies an entree — and a more complex rice dish can be a meal on its own. Rice is a perfect complement to a traditional satay, which consists of small pieces of marinated meat (usually chicken) skewered on sticks and grilled over a charcoal fire. Traditional satay dipping sauces often contain peanuts.

In my recipe for Malaysian Black Pepper Chicken Satay, the fresh cucumber slices refresh the palate in a perfect balance to the rich black pepper spices. You could easily prep this dish in the morning and let it marinate while you’re at work. Then when you get home, you’ve got a hot, hearty — and a bit exotic — meal in about 10 minutes.

Malaysian Black Pepper Chicken Satay with Peanut Dipping Sauce 5

Malaysian Black Pepper Chicken Satay with Peanut Dipping Sauce

Prep Time: 30 minutes; Cook Time: 10 minutes; Serves 4 people.

Ingredients

  • 4 chicken breasts (boneless and skinless), cut into medium-sized cubes
  • 1 package of Malaysian Black Pepper Sauce
  • Bamboo skewers, soaked in water to avoid burning
  • 1 cucumber, sliced
  • 2 packets of Malaysian Satay Dipping Sauce, peanut flavor
  • 2 cups instant brown rice

Directions

Cut the chicken breasts into medium-sized cubs, large enough to stay together when skewered. Place in a resealable plastic container. Marinate in Malaysian Black Pepper Sauce in the refrigerator for 4 to 8 hours.

Malaysian Black Pepper Chicken Satay with Peanut Dipping Sauce 3

Prepare brown rice according to package directions. Slice cucumber; set aside.

Malaysian Black Pepper Chicken Satay with Peanut Dipping Sauce 4

Thread the chicken on the bamboo skewers and grill for 3 minutes on each side, or until fully cooked with a slight char on the chicken.  Serve hot with fresh cucumber slices, brown rice and peanut dipping sauce.

Malaysian Black Pepper Chicken Satay with Peanut Dipping Sauce 2

Entrees

Ranch Patty Melt

#SayCheeseburger #CollectiveBias #shop KRAFT Classic Ranch Patty Melt


#SayCheeseburger #CollectiveBias #shop KRAFT Classic Ranch Patty Melt

When you think about classic American foods, the cheeseburger definitely ranks among the top of the list. There’s something so satisfying about biting into a juicy, perfectly cooked burger on a toasted bun.

Even plain, a burger is delicious. But with a bun in hand, everybody can be a Picasso and ‘paint the canvas’ with the perfect combination of toppings. For most, that includes cheese, cheese and more cheese, please!

The patty melt is deceptively simple. Aside from the seasonings and butter, there are only about four ingredients: meat, onion, cheese and bread. It’s the preparation and how these ingredients are combined that give the patty melt its sizzle.

Sometimes a patty melt will be served with only sautéed onions and sometimes with a “secret sauce” – which is usually Thousand Island dressing. That tangy, creamy flavor is a great pairing with the sautéed onions.

For my Ranch Patty Melt recipe, I’m substituting the Thousand Island dressing with Kraft Classic Ranch dressing as a topping and with extra on the side for dipping.

During a trip to my local Walmart, I picked up all of the ingredients – including Kraft Natural Swiss Cheese (the BIG slices!) and Kraft Classic Ranch Dressing. I prefer ground turkey for my burgers, but you could also easily use lean hamburger.

#SayCheeseburger #CollectiveBias #shop KRAFT Classic Ranch Patty Melt

Ranch Patty Melt

After getting my ingredients in place, I mixed together the ground turkey, salt, pepper and Worcestershire sauce. Don’t skimp on the Worcestershire!

Form four oval patties with the meat, matching the relative shape of the crusty rye bread. Set the patties aside as we prepare the onions.

Slice up a yellow onion and sauté it in a skillet with butter over medium-low heat. It takes about 25 minutes to properly brown the onions, but be patient. If you rush the process, the onions could easily burn.

Can you see the buttery steam rising from the pan in the photo below? It smells sooooo goooood.

#SayCheeseburger #CollectiveBias #shop KRAFT Classic Ranch Patty Melt

Next up, cook the patties in a skillet over medium heat until done in the middle and browned on the outside. When the patties are cooked, you’re ready to start the final assembly.

In another skillet, melt 2 tablespoons butter over medium heat. You’re going to assemble each Ranch Patty Melt as follows:

  • slice of crusty rye bread
  • slice of Kraft Swiss cheese
  • turkey burger patty
  • one-fourth of the sautéed onions
  • two tablespoons Kraft Classic Ranch dressing
  • another slice of Kraft Swiss cheese
  • another slice of crusty rye bread

Grill the sandwiches in the skillet until golden brown on one side.  Add the remaining butter to the skillet and flip the Ranch Patty Melt sandwiches over. Cook until golden brown and crisp.

The cheese should be all melted and gooey. Cut in half and serve immediately.

#SayCheeseburger #CollectiveBias #shop KRAFT Classic Ranch Patty Melt

Doesn’t this look like absolute burger perfection? After you bite into it, you’ll think you went to burger heaven. How can it get any better?

#SayCheeseburger #CollectiveBias #shop KRAFT Classic Ranch Patty Melt

When you serve it with your favorite chips or fries and – most importantly – a side of Kraft Classic Ranch dressing for dipping!

#SayCheeseburger #CollectiveBias #shop KRAFT Classic Ranch Patty Melt

With the summer grilling season in full swing, you’ve got to try creating your own version of a cheeseburger classic.

How do you #SayCheeseburger? What are your favorite toppings for crafting the ultimate classic cheeseburger?

Ranch Patty Melt

Rating: 51

12 minutes

Cook Time: 28 minutes

Yield: 4 servings

Ranch Patty Melt

Ingredients

8 tablespoons butter, room temperature
1 large yellow onion, skinned, halved and sliced
1 1/4 pounds ground turkey (93% lean)
8 dashes Worcestershire sauce
1 teaspoon sea salt
1/4 teaspoon ground black pepper
8 slices Swiss Cheese
8 slices crusty rye bread
1/2 cup ranch dressing, plus more for dipping

Instructions

Organize your ingredients and cooking instruments. You'll need a medium bowl and three skillets (one small, one medium and one large) to prepare the onions, burgers and the completed patty melts.

In a medium bowl, mix together ground turkey, Worcestershire sauce, salt and pepper. Form into 4 oval-shaped patties, similar to the size of the rye bread slices. Put patties on a plate; set aside.

In a small skillet, melt 2 tablespoons butter over medium-low heat. Toss in the onions and cook for 25 to 30 minutes. Stir occasionally. Onions are done when they are golden brown and soft. Remove from heat and set aside.

In a large skillet, melt 2 tablespoons butter over medium heat. Cook the turkey burger patties on both sides, until done in the middle and browned on the outside. Set aside.

In the medium skillet, melt 2 tablespoons butter over medium heat. Assemble the patty melts first with a slice of rye bread topped with a slice of Swiss cheese. Add the turkey burger patty and one-fourth of the cooked onions. Cover the patty with 2 tablespoons ranch dressing followed by another slice of Swiss cheese. Top with another slice of rye bread, and grill the sandwiches until golden brown.

Repeat until all 4 sandwiches are in the skillet. When browned on one side, add the remaining 2 tablespoons butter in the skillet. Carefully flip each sandwich over, and cook until golden brown, crisp and cheese has melted.

Cut in half and serve immediately. Serve with additional ranch dressing on the side for dipping.

http://bakedchicago.com/ranch-patty-melt-recipe/

Desserts

Summer Needs S’mores Marshmallow Pop’ms

For me, a classic summertime flavor is the s’more. This no-bonfire-required recipe was inspired by the new stackable, flat marshmallows I found at my local grocery.

s'mores marshmallow pop'ms

All you need is three ingredients (chocolate chips, graham crackers and marshmallows) and 90 seconds in the microwave to feed that childhood craving for a sweet treat.

Start by melting a cup of Hershey’s milk chocolate chips in a microwavable ramekin. After 90 seconds, stir the chocolate chips to facilitate the melting. If needed, heat in additional 30-second increments and stir until melted and smooth.

s'mores marshmallow pop'ms

You could use your fingers, but I’ve found that to be really messy. So I recommend taking a small fork and piercing a marshmallow, then dipping it in the chocolate until the bottom is coated.

s'mores marshmallow pop'ms

Then dip the marshmallow, chocolate side down, in the graham cracker crumbs.

s'mores marshmallow pop'ms

Shake off the excess crumbs, and set the s’mores marshmallow pop’ms on a plate with the chocolate side facing up. Repeat the process with remaining marshmallows.

s'mores marshmallow pop'ms

Before you know it, you’ve got 2 dozen bite-sized portions of s’mores goodness to share with your family. Or not. That’s totally your call.

S’mores Marshmallow Pop’ms

Rating: 51

2 minutes

Cook Time: 2 minutes

Yield: 8 servings

3 s'mores marshmallow pop'ms

Ingredients

Instructions

Pour the graham cracker crumbs in a ramekin or small plate for dredging. Set aside.

Pour the chocolate chips in a microwavable ramekin. Cook on HIGH for 90 seconds in the microwave. Stir the chocolate chips to facilitate the melting process.

If needed, cook in additional 30-second increments, followed by stirring, until chocolate is melted and smooth.

Using a fork, pierce a marshmallow on one side. Then dip the other side of the marshmallow in the chocolate, followed by dredging in graham cracker crumbs. Shake off loose crumbs, and put on a plate.

Repeat with remaining marshmallows to make 24 s'mores marshmallow pop'ms.

http://bakedchicago.com/summer-needs-smores/