One of my go-to crunchy snacks is my “American Pie” Trail Mix. It’s got only four ingredients and you won’t believe how easy it is to make (in under 2 minutes!). I call it “American Pie” Trail Mix because it beautifully blends the flavors of warm cinnamon, tart apples, tangy cherries, and sweet maple-brown sugar.
Pour ingredients into a resealable plastic food bag.
Seal the bag and shake it up for a few seconds until all the ingredients are blended. This can also be a great burst of cardio activity and a stress release!
Then I put some of the trail mix in two smaller snack-sized bags for the car, and keep the remaining trail mix sealed in the bag in a cool, dry place. I commute about 3 hours a day, on average, and the drive home during rush hour can be brutal. Not only am I fighting the traffic but I’m fighting the hunger beast. Having a small nosh in the car that’s a better alternative to chips or chocolate means I can tame the hunger beast and avoid over-indulging when I get home.
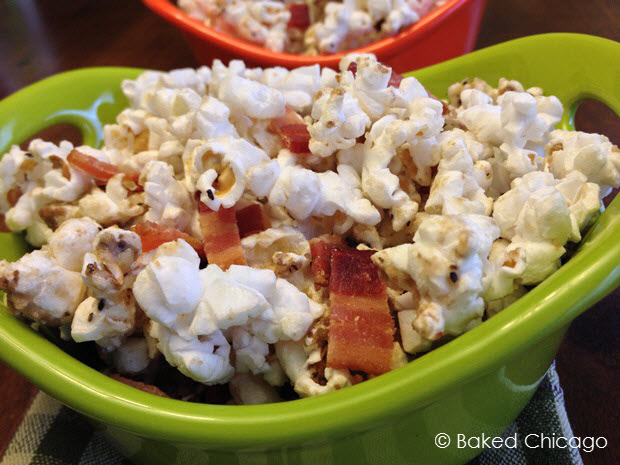
The butter and raspberry balsamic in this recipe for Pecorino Romano Peppered Popcorn, with Butter, Balsamic and Bacon blend beautifully to add some subtle notes to the strength of the Pecorino Romano cheese and black pepper.
And what can I say about the bacon? The hickory-smoked bacon is perfect with the balsamic. So good that I have to admit that I doubled up the amount of bacon, cause you can’t ever have too much bacon, right!
Pecorino Romano Peppered Popcorn, with Butter, Balsamic & Bacon
Rating: 51
Cook Time: 12 minutes
Yield: 4 servings
Ingredients
8 cups popcorn, popped
4 slices thick-cut hickory-smoked bacon, crispy and crumbled (or cut in 1/4-inch strips)
4 tablespoons butter, melted
2 tablespoons raspberry balsamic vinegar
1/2 cup grated Pecorino Romano cheese
1 tablespoon ground black pepper
Instructions
Cook bacon in the microwave on a microwave safe plate. I put the bacon strips on 5 sheets of paper towels on a large plate, then top it with 3 sheets of paper towels. Cook on high until crispy (about 6 to 8 minutes for thick-cut bacon). Let cool before crumbling or cutting into 1/4-inch strips.
In a small bowl, stir together Pecorino Romano grated cheese and ground black pepper for even seasoning. Set aside.
Pop a standard-sized bag of microwave popcorn according to package directions, yielding about 8 cups. Pour the popped corn in a large mixing bowl; set aside.
In a microwave safe medium-sized bowl, melt butter and balsamic together (2 to 3 minutes). Cover bowl to avoid making a mess in your microwave as the butter starts to get hot.
Drizzle about half the butter mixture over the popped corn, followed by about half the cheese/pepper mixture. Toss gently to combine and coat. Drizzle the remaining butter and cheese/pepper mixtures over the popcorn. Toss to coat evenly and serve immediately.
Notes
By drizzling only half the butter and a time, followed by sprinkling half the cheese mixture, will allow the popcorn to slowly absorb the butter. If you put too much on at once, the popcorn will become overly clumpy and the cheese mixture won't blend well.
Have you heard of “The Pistachio Principle?” The Pistachio Principle is a simple, mindful eating concept that can help fool yourself full, without feelings of deprivation.
The premise of The Pistachio Principle is that consumption of in-shell pistachios may help to slow eating because the leftover shells offer a visual cue about the amount of pistachios you’ve consumed. And that can potentially reduce your calorie intake.
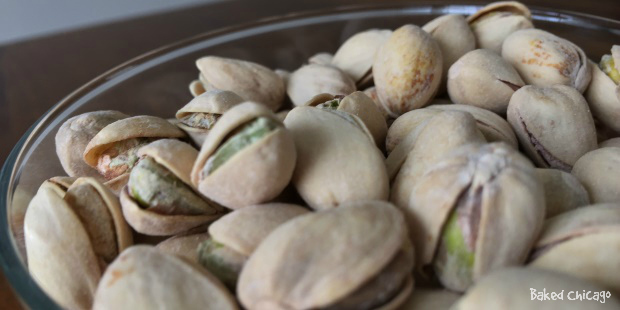
Pistachios are by far my favorite nut. For years, I’ve created original recipes using pistachios, ranging from flat breads to decadent brownies. But my favorite way to eat pistachios is right from the shell. They’re perfect for snacking along with Sunday night’s TV lineup of “The Good Wife,” “Downton Abbey,” and “Revenge.”
And I can personally attest that eating in-shell pistachios can be a great workout for your fingers. Prying open those pistachio shells helps reinforce hand-eye coordination and strengthens nimble fingertips.
Celebrate The Year of the Skinny Nut™
Pistachios have been acknowledged as a top food trend for 2015. Considered to be “The Nut of the Year,” pistachios are known as the “Skinny Nut” because they’re one of the lowest calorie, lowest fat nuts, and among the highest in protein. Pistachios can make for a great, everyday healthy snacking choice for those who are looking to satisfy a salty snack craving in a smarter way. Incorporating in-shell pistachios into a snack routine can help to get you back on track in 2015 after an over-indulgent holiday season.
To kick off 2015 – The Year of the Skinny Nut – I wanted to share a few of my favorite snack pairings that include in-shell pistachios.
For a snack to satisfy, it needs to have flavor, texture and hit all the right sweet, savory notes on the palate. My first perfect snack pairing with in-shell pistachios includes fresh mango slices that refresh and provide a mild sweetness. A few spoonfuls of creamy, low-fat raspberry yogurt provides a nice balance to the mango, while also adding back good bacteria into your body’s immune system. Top it all off with a hydrating low-sugar mango-orange juice blend.
For an afternoon snack that adds a mega-satisfying crunch, pair in-shell pistachios with chilled carrot chips, some Honeycrisp apple slices and a calming cup of Earl Grey tea. If you love crunch in your snack, every food component in this pairing really delivers.
You can learn more about the benefits of incorporating in-shell pistachios into your 2015 snacking plans when you enter “The Year of the Skinny Nut Sweepstakes” hosted on the Pistachio Health Institute Facebook page. The sweepstakes runs from January 7 – January 31, 2015, and you have a chance to win a year’s supply of pistachios. YUM!!!
I was selected for this opportunity as a member of Clever Girls and the content and opinions expressed here are all my own.
This shop has been compensated by Collective Bias, Inc. and Quaker®. All opinions are mine alone. #CollectiveBias #LoveMyCereal #QuakerUp
I am a crunchy snack addict. There’s no denying it. And I’m not ashamed to admit it.
But this self-diagnosed ‘crunchy snack addiction’ can sometimes lead me down the wrong snacking path. When left to act on impulse alone, I can make poor choices by reaching for the nearest salty chip or candy bar. You’ve been there, right?
When you’re running around all day taking care of four hyper pugs (like I do), it can be exhausting. Sometimes feeding and caring for them means I’m too tired to cook (or think!)…so I reach for whatever snack is closest at hand. To help avoid acting on impulse and to make better snacking choices, I like to have readily on hand in my pantry some home-blended crunchy snacks that can satisfy my deep desire for crunchy goodness.
One of my go-to crunchy snacks is my “American Pie” Trail Mix. It’s got only four ingredients and you won’t believe how easy it is to make (in under 2 minutes!). I call it “American Pie” Trail Mix because it beautifully blends the flavors of warm cinnamon, tart apples, tangy cherries, and sweet maple-brown sugar.
Pour ingredients into a resealable plastic food bag.
Seal the bag and – to paraphrase from a popular song – “Shake It Off” for a few seconds until all the ingredients are blended. This can also be a great burst of cardio activity and a stress release!
Then I put some of the trail mix in two smaller snack-sized bags for the car, and keep the remaining trail mix sealed in the bag in a cool, dry place. I commute about 3 hours a day, on average, and the drive home during rush hour can be brutal. Not only am I fighting the traffic but I’m fighting the hunger beast. Having a small nosh in the car that’s a better alternative to chips or chocolate means I can tame the hunger beast and avoid over-indulging when I get home.
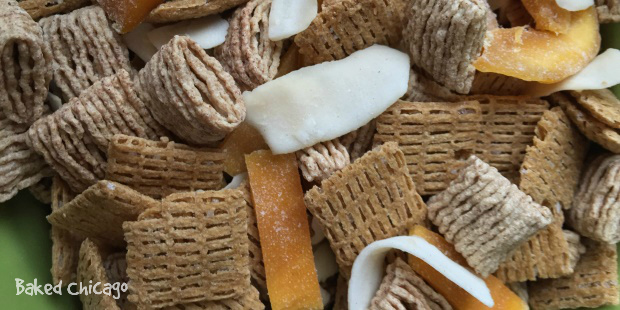
I wanted to share another quick trail mix recipe that is great for a tropical taste escape on a cold wintry day. It’s my Tropical Trail Mix snack.
Gather and measure your ingredients; pour into the plastic food bag. Shake until blended and you’re ready to snack like you’re on vacation in the Caribbean!
I love the versatility of cereal, especially Quaker® Oatmeal Squares which I first came to appreciate when I was making a savory holiday snack mix for my family. You could make your own favorite trail mix blend with your favorite dried fruits. Or add some savory flavors with cashews, almonds or whatever nut you love the most.
While my trail mix recipes have focused on using cold cereal as a base for a delicious crunchy snack, I’m also a fan of the easy breakfast. And Quaker® Real Medleys® Multigrain Cereal fills that bill to a tee! My favorite flavor is Peach Apple Walnut.
I wake up at 5:30 am to get ready for work. At that early hour, the last thing you want is a complicated breakfast. While it can be tempting to skip breakfast in favor of 15 minutes more of sleep, that’s not a solution to keep me fueled for the day. So I will sleep in for 10 minutes more of sleep and have a quick bowl of delicious (and crunchy!) multigrain flakes and granola clusters.
You’ve probably guessed that there’s no meal where I can’t make cereal the star of the bowl. I do #LoveMyCereal! Even all by itself – no milk needed – cereal right from the box can be downright delicious! I especially love Quaker® Oatmeal Squares (with a hint of cinnamon). The crunch is deeply satisfying and perfect to pair with a Honeycrisp apple for a portable afternoon snack at the office.
I got all of the ingredients for my special trail mix blends recipes at Walmart. The variety of Quaker® hot and cold cereals available at Walmart (in the cereal aisle) is amazing. Be sure to try them all:
I’ve shared a few of my favorite trail mix recipes featuring Quaker® Life and Oatmeal Squares cereals. What ingredients do you love most in a trail mix? Share your suggestions in the comments below. And kudos if you also come up with a fun, funky name for your special trail mix blend.
Disclosure: I was given an assortment of free samples by The Cheeses of Europe to review. I get no additional benefits for talking about this product or company. All opinions about this product are 100% my own.
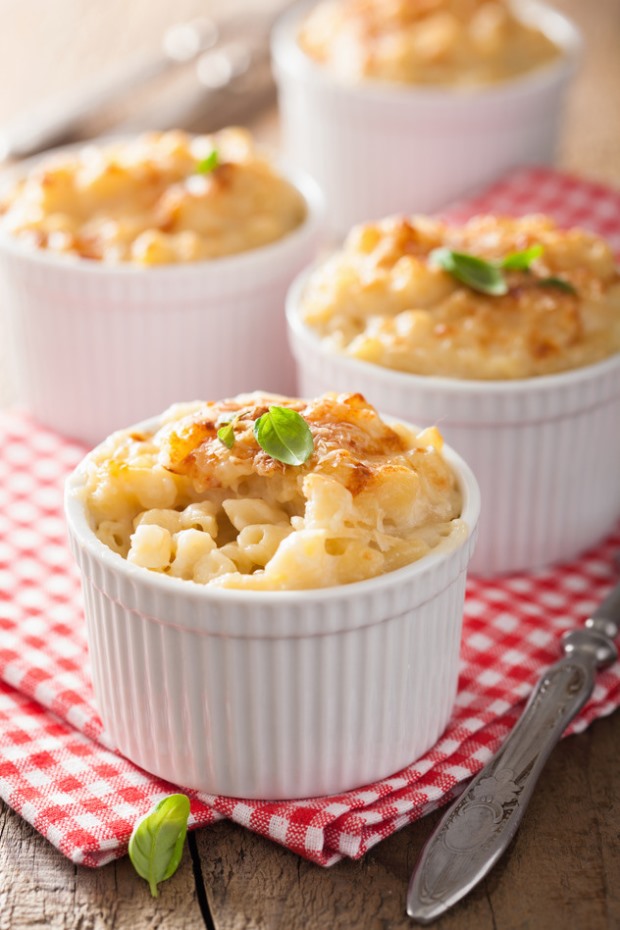
Comfort foods should bring both a physical and emotional comfort. But sometimes the comfort you remember as a child from your favorite foods doesn’t translate for your adult palate. Like the classic Mac & Cheese.
We all grew up with the ubiquitous Mac & Cheese blue box in our pantries filled with elbow macaroni and a “cheese-like” powdery substance. While that may have satisfied you as a kid, it is totally lacking of comfort for the adult you are today. The solution is to update the core ingredients in a classic Mac & Cheese recipe with quality ingredients that will satisfy the adult you are today that can also bring back some of the emotional comforts you associated with the dish as a child.
While it gets second billing in the title, CHEESE is the critical ingredient for a Mac & Cheese that you want to devour on a cold winter’s day. So for a modern twist, I’m using Mimolette Cheese instead of Cheddar cheese.
Mimolette Cheese?
Mimolette (pronounced mee moh LET) is made from cow’s milk and comes from the Pas-de-Calais region of France. It’s a hard cheese that typically comes in the shape of a cannonball. Its rind is brownish with tinges of orange.
Mimolette has a sharp, nutty and fruity taste that includes sweet hints of butterscotch. Its brilliant orange color makes it a colorful addition to any cheese platter – and it adds a sophistication without being pretentious to this adult Mac & Cheese dish.
Does that have you salivating? There’s something so indulgent and satisfying about gooey cheese hot from the oven that is almost indescribable; it makes every dish that more delicious!
Try this Mac and Mimolette Bake recipe and decide for yourself if the Mimolette should get top billing over the Mac. Bon appétit!
1 cup grated Mimolette cheese, plus more for garnish
1 large tomato, finely chopped
Instructions
Preheat your oven to 350 F degrees. Coat a 9x13-inch baking pan with non-stick spray; set aside.
In a large pot of boiling water (salted), cook the pasta according to package directions. Set aside.
Meanwhile in a medium saucepan, place the cream, brown sugar, sea salt and wine over medium-high heat. Bring to a slow simmer, then cook gently for 5 minutes. Don't let it boil or it will become grainy. Stir in Mimolette cheese and cook, stirring until melted.
Stir the sauce and chopped tomato through the cooked and drained shell pasta. Pour into the prepared baking pan. Sprinkle with more grated Mimolette cheese and bake for 10 minutes, or until golden brown on top.
Disclosure: I was given an assortment of free samples by The Cheeses of Europe to review. I get no additional benefits for talking about this product or company. All opinions about this product are 100% my own.
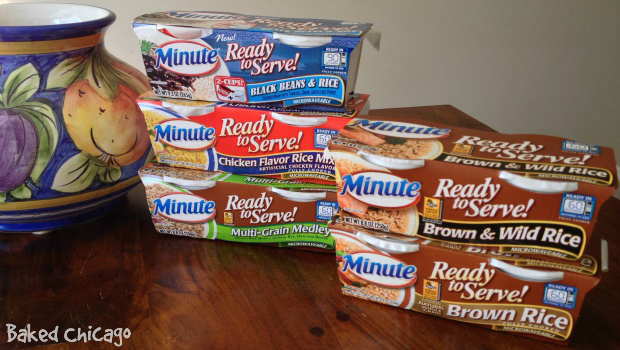
Like most of America, I’ve grown up with Minute® Rice. And for the last several years, I’ve cooked Minute® Instant Whole Grain Brown Rice at least a few times every week. Some weeks, I have it every day in some dish or another. It’s definitely a staple in my pantry! That’s why I was beyond excited when I was asked to try the new Minute® Ready to Serve Rice products. Thank you, Minute® Rice, for sponsoring this post. All opinions are my own.
When I first noticed Minute® Ready to Serve Rice in its individual portion packages, I didn’t buy it because I tend to buy the largest boxes of Minute® Instant Whole Grain Brown Rice that I can find at my local grocery store. So I was delighted when I discovered a number of new flavor (and whole grain) options in the Minute® Ready to Serveproduct line, including Brown Rice, Brown & Wild Rice, Multi-Grain Medley, Jasmine Rice, White Rice, Chicken Rice Mix, Yellow Rice Mix, Fried Rice Mix, and (the newest addition) Black Beans & Rice.
While I’ve mastered using Minute® Instant Whole Grain Brown Rice in my Harvey’s One-Skillet Wonder, I was curious to try the single portion servings because they are portable, offer easy portion control, and require only heating since they’re already cooked.
I hate (yes, HATE!) going out to eat for lunch at work. In addition to the high cost of eating out, it’s time-consuming, inconvenient and there’s little control over the quality (or wholesomeness) of the ingredients used. After seeing a HUGE-mongous number (over 70 and counting!) of Minute® Ready to Serve Rice Stir It Up! “No Recipe Recipes” for smarter snacks and easy meals on-the-go, I was inspired to create my own stir-in ideas with ingredients from my kitchen. And after a holiday season of irresistible sweet treats, I was committed to discovering some wholesome snacking options that I could easily incorporate into my day (at work or on the weekends).
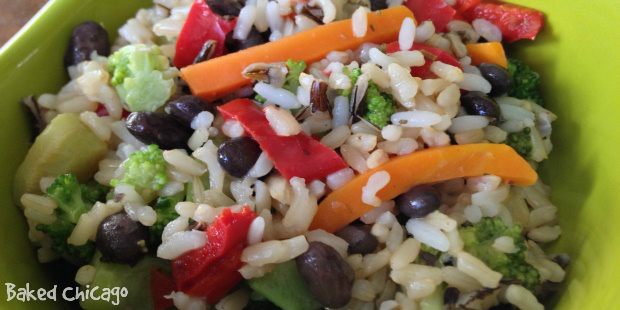
My first inspiration was an Italian Vegetable Blend. I heated 1/2 cup of frozen Italian Blend Vegetables in the microwave until hot (about 2 minutes) before stirring in one heated portion of Minute® Ready to Serve Brown & Wild Rice. The frozen Italian blend I used included broccoli, carrots, bell peppers and black beans. I then sprinkled about 1/2 teaspoon of Italian Seasoning on top and stirred well. This was “molto buona.” The red bell peppers, black beans and rice blend was just enough for a light meal, side dish or snack. It could easily be turned into a heartier lunch at the office with the addition of some grilled, Italian-style carved chicken breast.
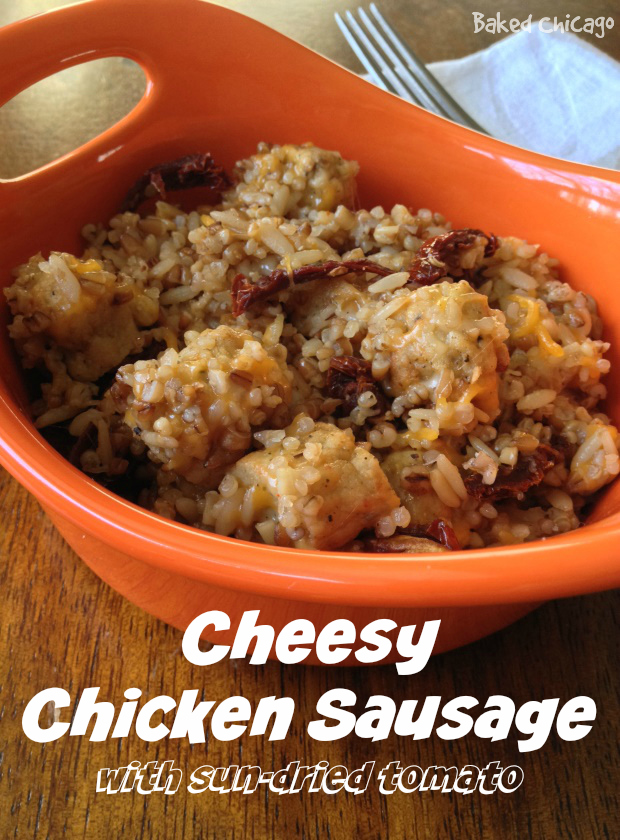
I love breakfast any time of the day, but admittedly don’t often have rice for breakfast. So I took three ingredients from my refrigerator that I’d normally use in making scrambled eggs or an omelet: sausage, cheese and sun-dried tomato. The result was my Cheesy Chicken Sausage with Sun-Dried Tomato dish, which would be a perfect hot (and quick) breakfast on a cold winter morning. Just heat one serving of Minute® Ready to Serve Multi-Grain Medleyand set aside. In a small bowl, heat 3 chicken sausage links (cut into 1/2-inch slices) and about 1 tablespoon of sun-dried tomato (Julienne cut) for about 2 minutes in the microwave. When done, add the Minute® Ready to Serve Rice and top with 2 tablespoons of shredded cheese (I used a Mexican Taco blend) and stir well. This would also be a great (and hearty) weekend lunch option when you’re not in the mood to spend time cooking over the stove.
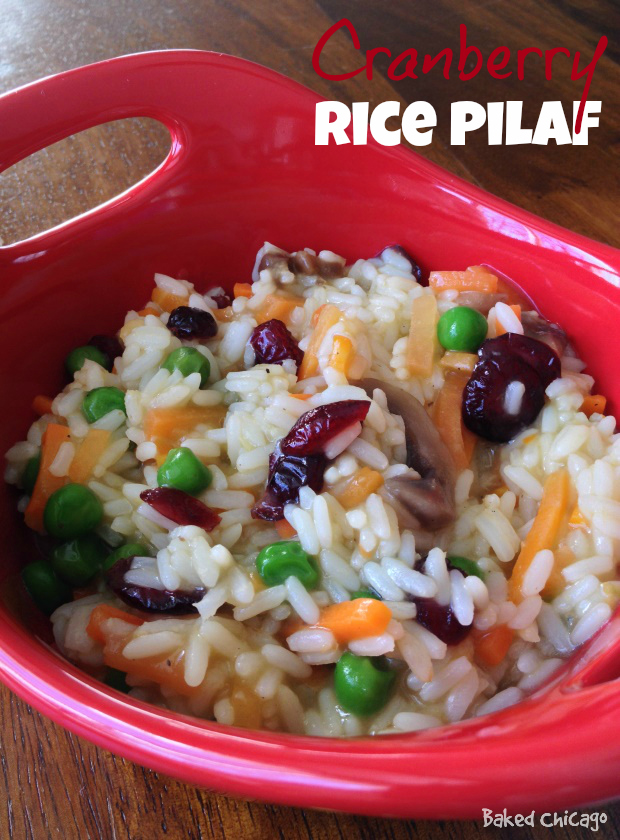
After a flurry of holiday cooking, I realized I had some left over dried cranberries that I needed to use or lose! I decided to take some frozen mixed vegetables, along with jarred sliced mushrooms, to create a holiday-inspired Cranberry Rice Pilaf. If you’ve made rice pilaf a lot, you know there are a zillion versions of rice pilaf recipes out there. Use whatever ingredients you have on hand and that you love most. To make my version, heat one serving of Minute® Ready to Serve Brown Ricein themicrowave, according to package directions, and set aside. In another bowl, heat about 1/2 cup of frozen peas and carrots with a few sliced mushrooms (if available) for about 2 minutes on high. Remove from microwave and mix with Minute® Ready to Serve Rice. Top with about 1 tablespoon dried cranberries and stir to mix thoroughly.
I literally bought every flavor of Minute® Ready to Serve Rice carried by my local grocery store. I’m excited to try the Black Beans & Rice and continue experimenting with other stir-in ingredients from my pantry. Check out the complete list of Minute® Ready to Serve Rice products and share with me in the comments section below what stir-in ideas you’re inspired to try in creating a wholesome, yummy snack on the fly!
This is a sponsored post written by me on behalf of Minute® Ready to Serve Rice.
Summer movie night at home means dinner and a movie – with snacks! Dinner needs to be simple, but that doesn’t mean it has to be boring. So I decided to give my go-to recipes for turkey meatloaf and popcorn a new twist with habanero hot sauce from El Yucateco. These hot sauce recipes add bold flavor and heat.
At my house, summer movie night is all about catching up on movies I never got around to seeing at the theater. And there are A LOT of them! It’s also about binge watching the latest seasons of “Orange is the New Black,” “Veep,” and “House of Cards.” [I think Netflix wins the award for best TV network this season!]
So I headed over to my neighborhood Target store on this shop for #CollectiveBias to pick up some El Yucateco Habanero Hot Sauce – which I found in the ethnic foods aisle. I got Red Habanero Hot Sauce and Green Habanero Hot Sauce to bring some excitement to these comfort food staples.
This turkey meatloaf recipe is MEGA because it has twice the meat, twice the spice and twice the cheese! It stands tall on the plate – and it’s a hearty mouthful of cheesy, spicy goodness!
If you think this meatloaf recipe is a twist on a patty melt because of the buttery grilled onions, you have read my mind! That was definitely my inspiration for stuffing the meatloaf with cheese and grilled onions.
To get started, you need to slowly cook a large yellow onion in butter on medium-low heat. The key to perfect grilled onions is slow cooking – with an occasional stir – until the onions turn lightly golden brown and translucent.
While the onions cook, mix together the ground turkey with sea salt, ground black pepper and Worcestershire sauce. These are very simple ingredients. But they season the ground turkey well to balance the spicy grilled onions. Put half of the turkey mix in the bottom of a standard loaf pan. Then layer two slices of Swiss cheese; set aside.
When the onions are fully cooked, add the red habanero hot sauce and gently stir. Then spoon the onion mixture on top of the cheese. Layer two more slices of cheese, then top with the remaining ground turkey mixture. Pop it in the oven for about 50 minutes and you’ve got a hearty dinner filled with bubbling cheese and steamy, spicy onions. Now that’s BIG FLAVOR!
This mega cheesy spicy stuffed turkey meatloaf also is great the next day. Slice it up for an out-of-the-ordinary meatloaf sandwich. [I recommend a crusty rye or sourdough bread.]
In a small skillet, melt butter over medium-low heat. Toss in onions and cook for 20 to 25 minutes. Stir occasionally. Onions are done when they are lightly golden brown and soft. They will continue to cook inside the meatloaf.
While the onions are cooking, preheat your oven to 375 F degrees. Spray a standard 9x5 loaf pan with non-stick spray; set aside.
In a large bowl, mix together the ground turkey, Worcestershire sauce, sea salt and black pepper.
Place half of the ground turkey mixture in the prepared loaf pan. Use a spatula or tablespoon to evenly spread the mixture. Lay two of the Swiss cheese slices on the ground turkey. Set aside.
Returning to the onions, remove from heat and stir in the red habanero hot sauce.Spoon the onion mixture on top of the first layer of cheese. Spread evenly and then top with the remaining cheese slices. Top with the remaining ground turkey meatload. Spreading the mixture evenly.
Bake for 50 minutes or until done. Remove from oven and let set for a few minutes before removing from pan. Slice and serve immediately.
For more spicy and flavorful hot sauce recipes, visit El Yucateco Recipes and get your #SauceOn.
Popcorn Makes Movies Better
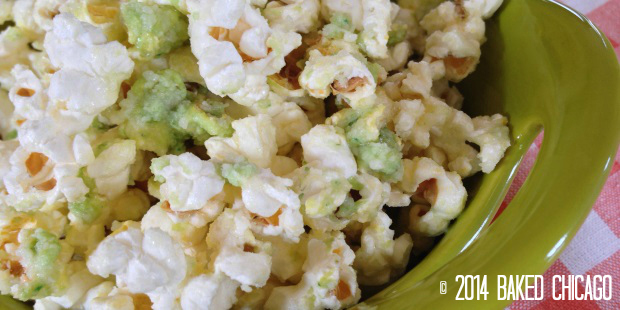
There must be some scientific research somewhere to prove this point: movies are just better with hot popcorn! And while I love the convenience of microwavable popcorn, it’s not the same as movie theater popcorn…until I add my special ingredients: grated Parmesan cheese and green habanero hot sauce.
Zesty Parmesan Popcorn with El Yucateco Green Habanero Hot Sauce Recipes
Pop a standard-sized bag of microwave popcorn according to package directions, yielding about 8 cups. Pour the popped corn in a large mixing bowl; set aside.
In a microwave-safe bowl, melt the butter and hot sauce together (about 60 seconds). Cover bowl to avoid making a mess in your microwave. I use a glass measuring cup and cover it with a paper plate.
Drizzle about half of the butter-hot sauce mixture over the popped corn, followed by half the Parmesan cheese. Toss gently to combine and coat. Drizzle the remaining butter-hot sauce and cheese over the popped corn. Toss to coast evenly and serve immediately. [By drizzling half of the butter-hot sauce at a time, followed by half the cheese, the popcorn can absorb the liquid more slowly. If you put too much on at once, the popcorn will become clumpy and the cheese won’t blend well.
It’s Show Time
Spoiler Alert: I feel like season 2 of “House of Cards” is calling my name tonight. I watched each hour-long episode of season 1 last weekend, and I’m totally hooked. Frank Underwood (Kevin Spacey’s character) is deliciously complex. He’s both evil and mesmerizing. You can’t help but root for him even though he does despicable things (like murder!).
Did you know that April is National Soft Pretzel Month? I’m not sure it needs an entire month to itself but I do applaud the pretzel in all its salty glory.
I definitely enjoy a warm, soft pretzel fresh out of the oven. Especially if it’s covered in mustard or a cheesy beer dip! But I’ve always been more partial (and quite addicted) to a crunchy pretzel. I love crunch and texture and you can’t get more crunchy than a hard pretzel.
When I say addicted, you might think I’m exaggerating. But I’m not. I remember when I first lived on my own, I’d go to the grocery store and buy no less than 4 or 5 bags of different kinds of pretzels. Braided pretzels. Pretzel twists and pretzel sticks. Mini pretzels and homestyle pretzels. Definitely pretzel rods (those are my all-time faves; they’re great to dip into some French onion dip!). At the time, I lived in southeastern Pennsylvania so some Pennsylvania Dutch Sourdough Hard Pretzels were always in the mix.
After getting home from shopping, I’d take all of the pretzel bags and open them up. Then one-by-one, I’d dump them into a super-gigantic-XXL-humongous orange-yellow Tupperware bowl. I loved that Tupperware bowl (I wonder where it went?) because I would munch on my mega-bowl of pretzels all week long. No wonder I developed TMJ in my late 20’s!
Fast forward to today. While I no longer nosh on a gigantic bowl of hard pretzels all week long, I’ve not given up my predilection for pretzels. I am much more selective on when to enjoy them and I’ve learned to love a fresh-baked soft pretzel warm from the oven.
The best soft pretzel recipe I’ve come across belongs to my friend Carlyn Berghoff, 4th-generation-owner of The Berghoff Restaurant. She has a cherished family recipe for Bavarian pretzels that her family has made for decades – and which is still served today – at The Berghoff Restaurant. A few years back, Carlyn wrote a Berghoff Family Cookbook and shared her recipe so that you (and I) can make them at home for ourselves.
Do you have a predilection for pretzels? What kind of pretzels make you reach for a cold pint of beer?
1 large egg white, well beaten with 1 tablespoon water
Pretzel (coarse) salt, as needed
Instructions
Preheat the oven to 450°F. Do not use a convection oven for this recipe.
To mix in a mixer: In the bowl of a standing mixer fitted with the paddle attachment, combine the flour, yeast, sugar, and salt, and stir to mix; add the water, butter, and egg yolk, and mix on low until the dough pulls away from the side of the bowl.
Fit the mixer with the dough hook and knead the dough at the lowest speed until the dough is smooth and elastic, about 8 minutes, adding some or all of the remaining flour as needed. Cover with plastic wrap lightly sprayed with cooking spray and let rise in a warm place until doubled, about 1 hour.
To mix by hand: In a 4-quart bowl, combine the flour, yeast, sugar, and salt, and whisk to mix; add the water, butter, and egg yolk and, using a large spoon, stir until the dough pulls away from the side of the bowl.
Remove the spoon and, using your hands, knead the dough right in the bowl until the dough is smooth and elastic, about 8 minutes, adding some or all of the remaining flour as needed. Cover with plastic wrap lightly sprayed with cooking spray and let rise in a warm place until doubled, about 1 hour.
To mix in a food processor: In the work bowl of a large-capacity (14-cup) food processor fitted with the plastic dough blade, combine the flour, yeast, sugar, and salt, and pulse to mix. Add the water, butter, and egg yolk, and pulse until the dough pulls away from the side of the bowl and forms a cohesive mass. Add additional flour as needed through the feed tube.
To shape the pretzels: Turn out the dough on a lightly floured board and knead briefly, about 1 minute. Cut the dough into twelve equal-size pieces. Roll out each dough piece into a 24-inch-long rope. Make a U shape with the rope. Holding the ends of the rope, cross them over each other and press the ends down on to the bottom of the U to seal, forming a “pretzel shape.” For small pretzels, cut the dough into 24 equal-size pieces. Roll out each dough piece into a 12-inch-long rope and shape as directed.
Gently place each pretzel on a parchment paper-lined baking sheet (two pans). Brush the tops lightly with the egg white mixture. Sprinkle each with ½ teaspoon of coarse salt, or to taste. Bake in the preheated oven for 14 to 16 minutes, or until browned firm. Transfer to a cooling rack and let cool for 5 to 10 minutes before serving.
Notes
This recipe is by Carlyn Berghoff of Chicago's iconic The Berghoff Restaurant.
When I lived in Houston about 10 years ago – my first time living in the Southwest – I was surprised by how pervasive Tex – Mex cuisine was from the grocery store to the fast food restaurant or from the fine dining restaurant to the vending machines. It took me a while to understand and appreciate just how special and tasty Mexican-inspired foods can be. Part of the reason I didn’t take right away is because I’m not someone who loves spicy, spicy foods. I like bold flavors but only with mild heat. One of my favorite dishes to make – and with which I could control how much heat to add – is this Texas-inspired queso sausage dip.
Many queso dip recipes will add green chiles or other spicy chili peppers. Mine is perfect (for me) without that. And truth be told, you could switch out almost any of the ingredients in this dish with what you have on hand. Don’t have white American cheese, use Velveeta. Don’t have Mozzarella cheese, how about a Monterey Jack. When these ingredients are hot and melted together, it’s the flavor of the combination that sings rather than any single ingredient.
And nothing is more savory than warm queso sausage dip on top of a restaurant-style tortilla chip. Yum! What’s your favorite “dipper” when you make queso dip?
1 pound bulk mild Italian sausage, cooked and crumbled
1/2 cup black olives, chopped
Instructions
Combine all ingredients in a 4-quart slow cooker. Cook on LOW heat for 2 to 3 hours, stirring occasionally to combine. When mixture is completely melted and hot, it is ready to serve.
No amount of thunder snow, polar plunge or sub-zero arctic blasts will stop me from enjoying the premier of The Tonight Show starring Jimmy Fallon tonight. Yes, TONIGHT!
I’ve been a fan of Jimmy Fallon from his early days on Saturday Night Live. And he just keeps getting better and funnier. Witness this hilarious spoof of the “Evolution of Mom Dancing” with (Chicago’s very own) First Lady Michelle Obama. Just brilliant!
So I’m whipping up a batch of my Pecorino Romano Peppered Popcorn, with Butter, Balsamic and Bacon. How’s that for alliteration! There’s enough to share with the family, if you so choose!
The butter and raspberry balsamic blend beautifully to add some subtle notes to the strength of the Pecorino Romano cheese and black pepper.
And what can I say about the bacon? The hickory-smoked bacon is perfect with the balsamic. So good that I have to admit that I doubled up the amount of bacon, cause you can’t ever have too much bacon, right!
Pecorino Romano Peppered Popcorn, with Butter, Balsamic & Bacon
Rating: 51
Cook Time: 12 minutes
Yield: 4 servings
Ingredients
8 cups popcorn, popped
4 slices thick-cut hickory-smoked bacon, crispy and crumbled (or cut in 1/4-inch strips)
4 tablespoons butter, melted
2 tablespoons raspberry balsamic vinegar
1/2 cup grated Pecorino Romano cheese
1 tablespoon ground black pepper
Instructions
Cook bacon in the microwave on a microwave safe plate. I put the bacon strips on 5 sheets of paper towels on a large plate, then top it with 3 sheets of paper towels. Cook on high until crispy (about 6 to 8 minutes for thick-cut bacon). Let cool before crumbling or cutting into 1/4-inch strips.
In a small bowl, stir together Pecorino Romano grated cheese and ground black pepper for even seasoning. Set aside.
Pop a standard-sized bag of microwave popcorn according to package directions, yielding about 8 cups. Pour the popped corn in a large mixing bowl; set aside.
In a microwave safe medium-sized bowl, melt butter and balsamic together (2 to 3 minutes). Cover bowl to avoid making a mess in your microwave as the butter starts to get hot.
Drizzle about half the butter mixture over the popped corn, followed by about half the cheese/pepper mixture. Toss gently to combine and coat. Drizzle the remaining butter and cheese/pepper mixtures over the popcorn. Toss to coat evenly and serve immediately.
Notes
By drizzling only half the butter and a time, followed by sprinkling half the cheese mixture, will allow the popcorn to slowly absorb the butter. If you put too much on at once, the popcorn will become overly clumpy and the cheese mixture won't blend well.
Valentine’s Day isn’t just for lovers anymore. It’s evolved to where we’re encouraged to also show those closest to us how much we care. That might include your mom and dad, brothers and sisters, and sometimes your best girlfriend or even your pet. But don’t forget the ‘littlest Valentines’ living under your roof – aka the kids! They’ll greatly appreciate even a small gesture of how much you love them. This recipe for Chocolate-Raspberry Heart Tarts is a perfect Valentine’s Day breakfast or after-school treat for your rug rats. It’s so easy to make and you can change-up the ingredients to reflect your favorite flavor combinations.
I love the combination of chocolate and raspberry, so I used my favorite raspberry preserves and a new chocolate spread product from Hershey’s. But you could use peanut butter and jelly, banana and chocolate, or just about any flavor combo that your kids will love. And if you go the non-chocolate route, like peanut butter and banana, you could even share a heart tart with your furry, four-legged kids. My four pugs LOVE banana and peanut butter, so I’m going to make one special heart tart for them to share (remembering portion control for my svelte puggies!). That comes down to one heart chamber per pug!
Use a heart-shaped cookie cutter (about 3.5- to 4-inches wide) to cut out your hearts from store-bought pie crust. Arrange them on a parchment paper-lined baking sheet.
Put 1 level teaspoon each of preserves and chocolate spread in the center of each heart. Don’t overfill, or the contents will just burst out during the baking process giving your heart tart a heart attack. Not pretty. Use egg wash to seal the hearts, and crimp the edges with a fork. Brush the egg wash on top of each heart and sprinkle with turbinado sugar.
Bake for about 16 minutes or until golden brown and puffy. Remove from oven and let cool slightly before serving. What a great way for you and your kids to start off Valentine’s Day!
Influencer Disclosure: I was given a free sample of Hershey’s spreads chocolate because I’m a Klout influencer. I am under no obligation to receive this sample or talk about this company. I get no additional benefits for talking about this product or company. All opinions about this product are 100% my own.
Preheat oven to 400 F degrees. Line a baking sheet with parchment paper; set aside.
Beat the egg in a small bowl. Unroll 2 sheets of store-bought pie dough. Using a 3.5-inch heart cookie cutter, cut out about 8 heart shapes from each sheet of pie dough.
Arrange half of the hearts on the prepared baking sheet. Fill the center of each heart with 1 level teaspoon of raspberry preserves and 1 level teaspoon of chocolate spread.
Moisten the edges of the remaining hearts with the beaten egg. Align each heart on top of a heart on the baking sheet. Press firmly around all edges to seal the fillings inside each tart. Crimp the edges with a fork.
Brush the tops with the remaining egg and sprinkle generously with turbinado sugar.
Bake until golden brown and puffed, about 16 to 18 minutes. Do not overbake or the turbinado sugar will burn.
I think everyone waxes a bit nostalgic when it comes to memories of favorite childhood treats. When I think back to the sodas and snacks I had as a kid, I’m kind of surprised at how they’ve evolved over the years. The simple, delicious M&Ms® reigned supreme for Halloween trick-or-treating and the Snickers® candy bar was the new kid on the block.
Today, there are so many varieties and flavors – in addition to the original versions – it can make your head spin. Even soda has changed exponentially. As a kid, I remember stopping at the park canteen after swimming lessons for a fountain Green River® soda. I can’t tell you what the flavor tasted like, but I remember I obsessed over it.
Back to snacks (everything always comes back to snacks, right?). One of those childhood candies that appears to be no more is French burnt peanuts. Specifically Brach’s® French Burnt Peanuts. If you’ve ever had them, you know exactly what I mean. They were crunchy and sweet and oddly bright red. And oh so addictive (the sugar, right!).
Every know and again I get a craving for those French burnt peanuts and for a few years I was able to locate them online via Amazon. But in my latest search, I realized that the Brach’s version of French Burnt Peanuts has gone away. I searched and searched online for possible recipes to recreate the flavors, but nothing I found online really recreated the right texture and colors.
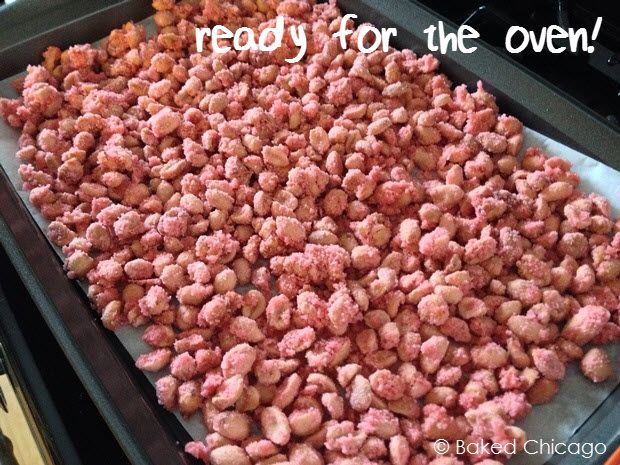
So I decided to give it a try to adapt some of the better recipes I found to see if I could get just a few steps closer to that Brach’s standard that I so fondly remembered. You only need 4 ingredients: peanuts, sugar, water and food coloring. You put all the ingredients in a pot and heat over medium-high until all the moisture had evaporated. At first, it will feel like it’s taking too long. You’ll wonder if you’re doing something wrong. Be patient. The mixture needs to boil, or in this case foam, to help with the transformation of the coating.
Regularly stir the mixture to ensure even coating. The last few minutes will rapidly accelerate as the sugar and water foams; watch closely because if all the water is gone the remaining sugar may easily burn. The mixture will be very sticky and dry.
Now you’re ready to bake them in the final step. You’ll notice from the above image before you pop them in the oven that the color is a bright pink / light red. I tried a number of variations in the food coloring but never really got past light red. Something tells me the vibrant red color burned into my childhood memories “may” be un-achievable with today’s food coloring. Stir the mixture every 15 minutes. When done, let cool completely and store in an airtight container.
While the final product doesn’t have the same dark red color of the original, these French burnt peanuts taste as good, if not better, than the childhood snack I remembered. And with this end-product, I can actually taste the quality of the peanuts and brown sugar. They say you can’t go home again, but in this case I think this recipe got darn close in some respects and totally hit the mark in most.


 No amount of thunder snow, polar plunge or sub-zero arctic blasts will stop me from enjoying the premier of