One of my favorite things about the fall season is the abundance of apples. Specifically, Honeycrisp apples. If you’ve never had one, do your palate a favor and try one ASAP. Honeycrisp apples are juicy, light and delicately sweet. In a word, refreshing.
Apple crisp is a go-to fall dessert but I wanted to change things up just a bit and pair the sweetness of the Honeycrisp with the tartness of a cranberry. Cranberries are really versatile and worthy of being on any menu year round.
Normally, I would peel apples for a pie or dessert. But I was feeling adventurous and decided to leave the skin on to see if it would add a layer of flavor. To be honest, the apple slices were so thin that by the time the dish came out of the oven I couldn’t tell the peels were left on. So while it didn’t add to the flavor profile, it did save me a lot of prep time to skip the peeling process. Still a win!
Do you have a favorite kind of apple to bake with? I’d love any recommendations on what I should bake with next. Until then remember to bake like you mean it!
Rustic Honeycrisp Apple & Cranberry Crisp with Salted Caramel
Rating: 51
Ingredients
Filling
3 medium Honeycrisp apples, cored and sliced
2 cups cranberries
1 cup sugar
3 tablespoons all-purpose flour
1 tablespoon corn starch
1 tablespoon ground cinnamon
1 teaspoon ground nutmeg
Topping
1 1/2 cups instant oats
1/2 cup all-purpose flour
1/2 cup dark brown sugar
1/2 cup butter, melted
4 tablespoons salted caramel (optional)
Instructions
Preheat oven to 375 degrees Fahrenheit. Butter or use non-stick spray an 8 x 8 baking dish.
In large bowl, combine apple slices, cranberries, sugar, cinnamon, corn starch, flour and nutmeg until well coated. Fill the baking dish.
In a medium bowl, mix the topping ingredients (except salted caramel) until crumbly. Sprinkle evenly over fruit mixture. If using salted caramel, drizzle over top of crumble.
Bake for 45 - 55 minutes, or until fruit is tender. Cool at least 20 - 30 minutes before serving. Refrigerate any uneaten portion for up to several days, covered with air-tight wrapping.
Notes
I call this a rustic apple crisp, in part because I left the apple peel on the apples. If you prefer to peel that apples, that works too. But I've found you really don't notice the peel if you slice the apple thinly. And it's much easier prep!
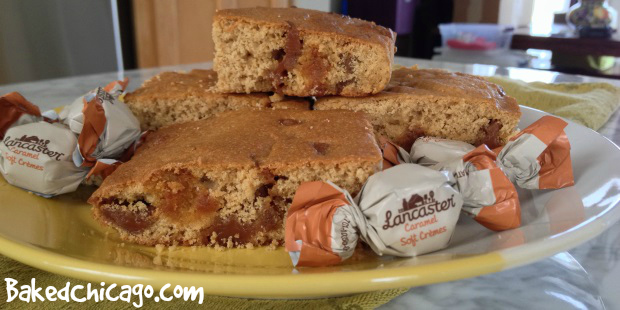
20 LANCASTER Caramel Soft Cremes, cut and quartered
1 tablespoon plus 1 1/4 cups all-purpose flour, divided
6 tablespoons butter, room tempterature
3/4 cup packed dark brown sugar
1 egg
1 tablespoon milk
1 teaspoon vanilla extract
1/2 teaspoon baking soda
1/8 teaspoon sea salt
Directions
Preheat your oven to 350 F degrees. Line an 8-inch square baking pan with parchment paper. Spray with non-stick spray to ensure easy removal. Set aside.
Remove the wrappers from caramel candies. Cut each caramel into quarters. Toss the caramel pieces with 1 tablespoon flour to keep the pieces from sticking together.
Beat the butter and brown sugar in a large bowl until fluffy. Add the egg, milk, and vanilla. Beat well.
In a medium bowl, stir together the remaining flour, baking soda and salt. Add the dry mixture to the web mixture. Beat until well blended. Fold in the caramel pieces.
Spread the batter into your prepared baking pan. Using a spatula, ensure the batter is evenly spread in the pan.
Bake for 25 to 30 minutes, or until lightly browned.
Cool in the pan for 15 minutes, then remove and cool completely on a wire rack. Cut into 16 bars.
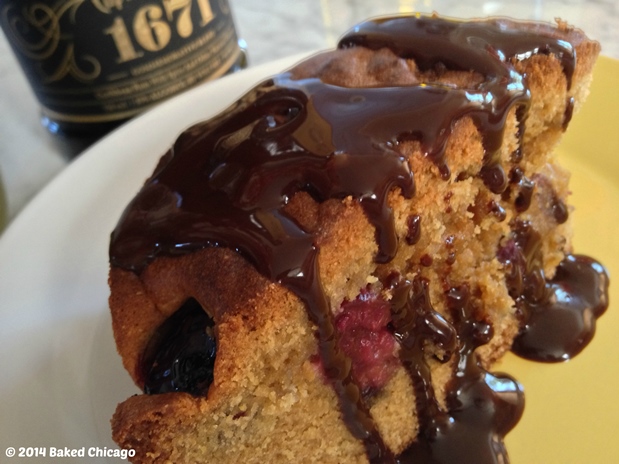
I decided to macerate the Bing cherries in some Captain Morgan® 1671 rum. This Caribbean rum has aromas of sweet oak and dark fruit – with hints of chocolate. That makes it perfect for this olive oil cake with Bing cherries and dark chocolate chips. Macerating is just like marinating. I took a canning jar and filled it with pitted Bing cherries. Then I topped it off with Captain Morgan 1671 Rum. I let cherries soak for a few hours, but you could also let it soak overnight in the refrigerator. Just don’t throw out the rum after the cherries are done macerating! By itself it makes for a nice sipping companion while you’re baking – or a great addition to an ice cold Diet Coke. This batter is quite thick, so use a sturdy spatula or spoon when you start to incorporate the chocolate chips. You could also mix the Bing cherries into the batter, but I prefer to layer them evenly on the batter to ensure nearly every bite of this rich cake has a burst of rum-infused cherry in it.
I like to serve this cake while it’s still warm. The chocolate, cherries and rum make for a seriously decadent flavor combination. Fresh Bing cherries and Caribbean spiced rum. Now that’s what summer should taste like!
In a resealable container, soak Bing cherries in 1 cup of rum. Let cherries macerate for at least a few hours, and up to 24 hours.
Preheat your oven to 350 F degrees. Lightly coat a 9" round cake pan with butter; set aside.
In a large mixing bowl, whisk together eggs and brown sugar for a few minutes, letting air incorporate into the mixture. Add vanilla, olive oil, lemon zest and lemon juice.
In a medium mixing bowl, stir together flour, cornmeal, baking powder and salt. Add dry mixture to the wet mixture. Mix until combined; batter will be thick. With a spatula, stir in 1 cup chocolate chips.
Pour half of the batter into your prepared baking pan. Spread about 2 cups of cherries evenly. Save 1/2 cup of macerated cherries for a garnish. Spoon remaining batter over cherries; it's okay if the fruit peeks through the batter.
Bake until lightly golden brown and a toothpick inserted comes out clean, about 35 to 40 minutes in a convection oven. If you use a non-convection oven, baking time will take a bit longer.
Remove from oven and let cool on a wire rack for 10 minutes. Remove cake from cake pan and let cool completely on a wire rack.
Cut cake and serve with reserved Bing cherries as garnish. Put remaining chocolate chips in microwave-safe bowl; heat on HIGH for 60 to 90 seconds or until melting process has just started. Remove from microwave and stir with teaspoon until completely melted. Drizzle warm chocolate over slices and Bing cherry garnish; serve immediately.
I am excited to share a recipe for brownie cookies that I’ve “jacked up” with some Garrett’s Cheddar cheese and Caramel Crisp popcorn (formerly known as the Chicago Mix)!
My advice: buy a larger bag than what you need for the recipe. If you’re like me, half of it will be gone by the time you start baking in the kitchen. It’s hard to resist Garrett Popcorn!
The contrast of savory Cheddar cheese and sweet Caramel Crisp popcorn is genius on its own. But wrapped inside a brownie cookie takes it to a whole other level of decadence and goodness.
Preheat oven to 350° F. Line a baking sheet with parchment paper; set aside.
In a microwave-safe bowl, heat the chocolate chips on high for about two minutes. Stir with a spatula to facilitate the melting process. Continue heating in microwave in additional 30-second intervals, and stirring after each interval. Be careful not to burn the chocolate. Stirring after each interval will ensure the chocolate melts evenly and the chocolate will continue to melt while you are stirring. Stir until completely melted; set aside and let cool.
In a small bowl, stir together flour, baking powder and salt. Set aside.
In a large bowl (or mixing bowl of a stand mixer), beat together butter and brown sugar (about two minutes on medium speed). Add eggs and vanilla, beating until combined.
With mixer on low speed, alternately beat in chocolate and flour mixtures. Mix just until combined. Fold in the Chicago Mix popcorn. The dough will be very thick and the popcorn will begin to breakdown in the batter.
Drop dough by heaping tablespoons, two inches apart, onto the prepared baking sheet. Bake for 12 to 16 minutes. Remove from oven and let sit for two minutes before transferring to wire rack to cool completely.
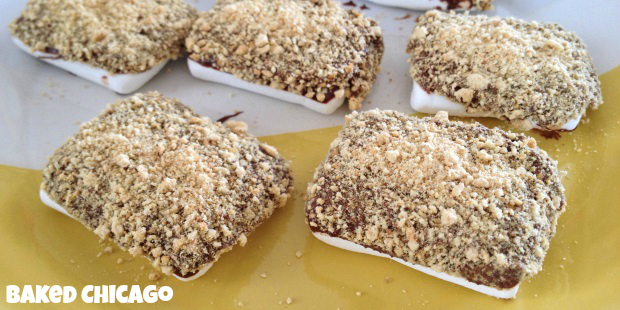
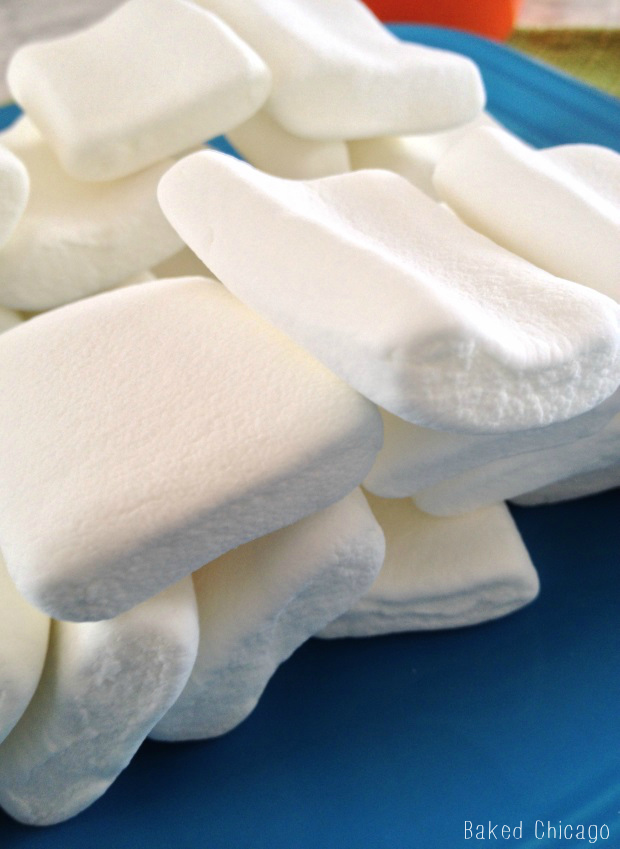
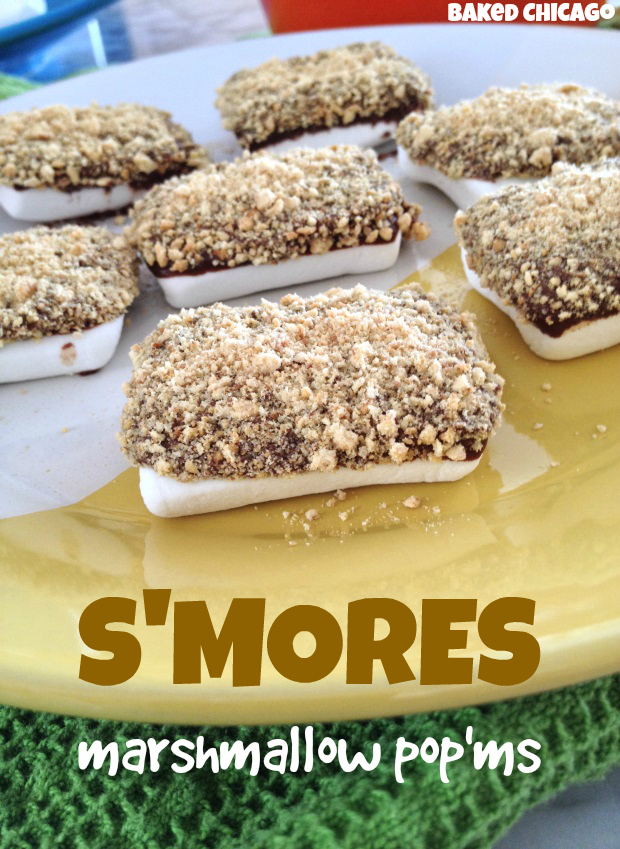
For me, a classic summertime flavor is the s’more. This no-bonfire-required recipe was inspired by the new stackable, flat marshmallows I found at my local grocery.
All you need is three ingredients (chocolate chips, graham crackers and marshmallows) and 90 seconds in the microwave to feed that childhood craving for a sweet treat.
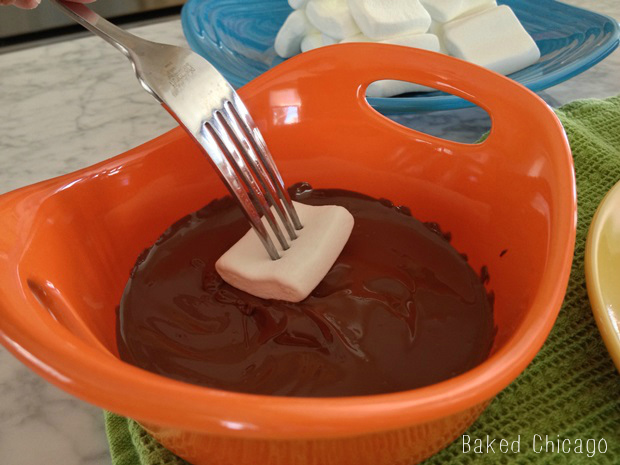
Start by melting a cup of Hershey’s milk chocolate chips in a microwavable ramekin. After 90 seconds, stir the chocolate chips to facilitate the melting. If needed, heat in additional 30-second increments and stir until melted and smooth.
You could use your fingers, but I’ve found that to be really messy. So I recommend taking a small fork and piercing a marshmallow, then dipping it in the chocolate until the bottom is coated.
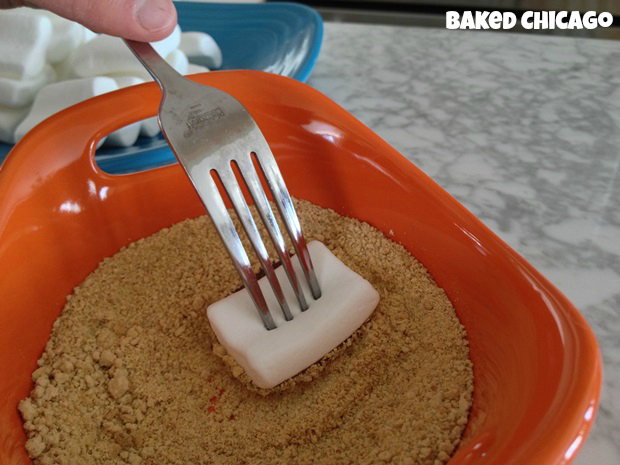
Then dip the marshmallow, chocolate side down, in the graham cracker crumbs.
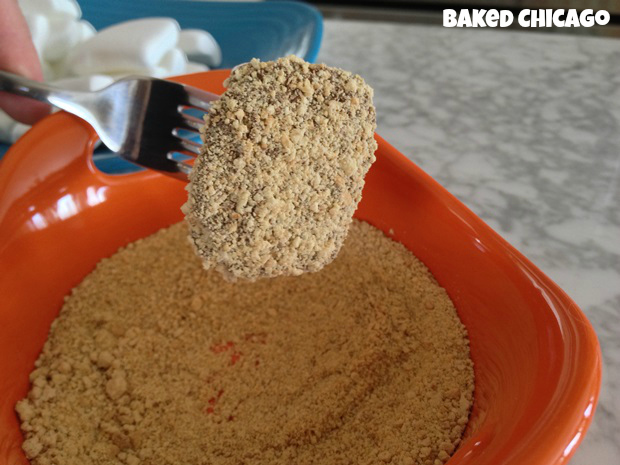
Shake off the excess crumbs, and set the s’mores marshmallow pop’ms on a plate with the chocolate side facing up. Repeat the process with remaining marshmallows.
Before you know it, you’ve got 2 dozen bite-sized portions of s’mores goodness to share with your family. Or not. That’s totally your call.
Pour the graham cracker crumbs in a ramekin or small plate for dredging. Set aside.
Pour the chocolate chips in a microwavable ramekin. Cook on HIGH for 90 seconds in the microwave. Stir the chocolate chips to facilitate the melting process.
If needed, cook in additional 30-second increments, followed by stirring, until chocolate is melted and smooth.
Using a fork, pierce a marshmallow on one side. Then dip the other side of the marshmallow in the chocolate, followed by dredging in graham cracker crumbs. Shake off loose crumbs, and put on a plate.
Repeat with remaining marshmallows to make 24 s'mores marshmallow pop'ms.
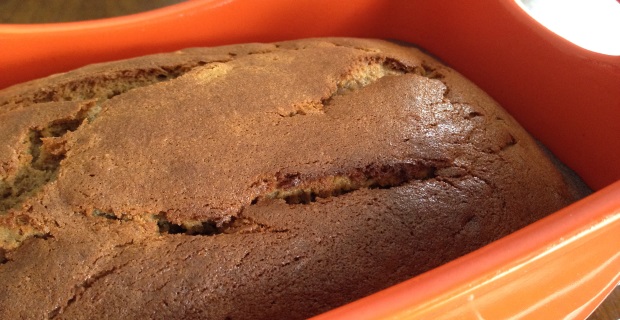
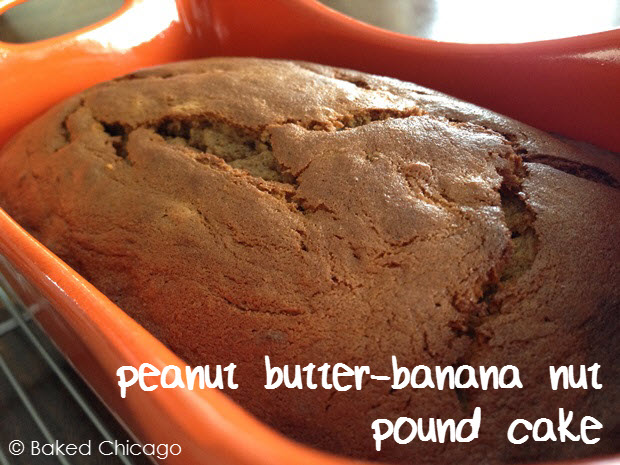
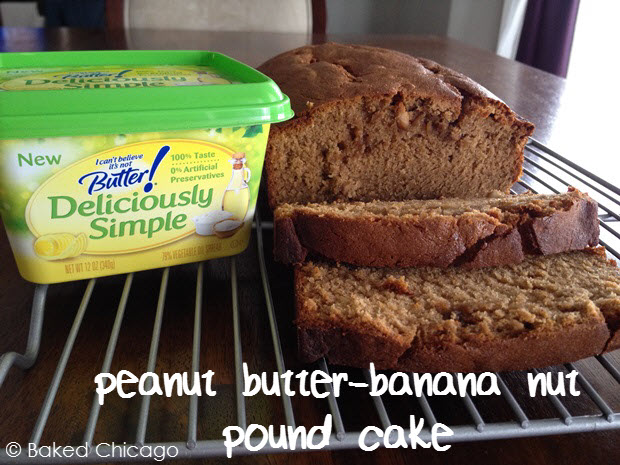
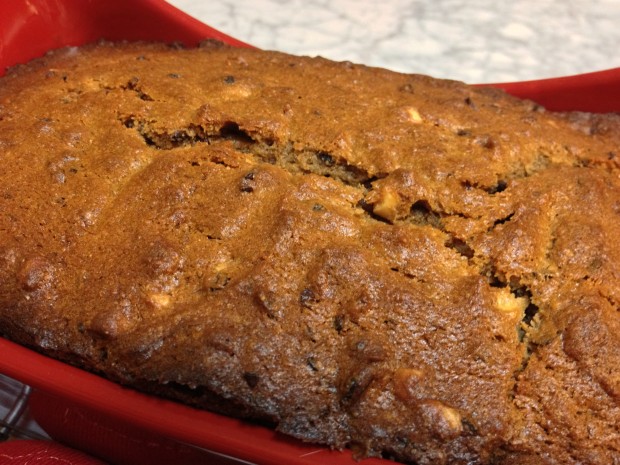
This pound cake is perfectly balanced with the flavors of the peanut butter, banana and pistachios. Making this pound cake slightly sweet AND slightly savory.
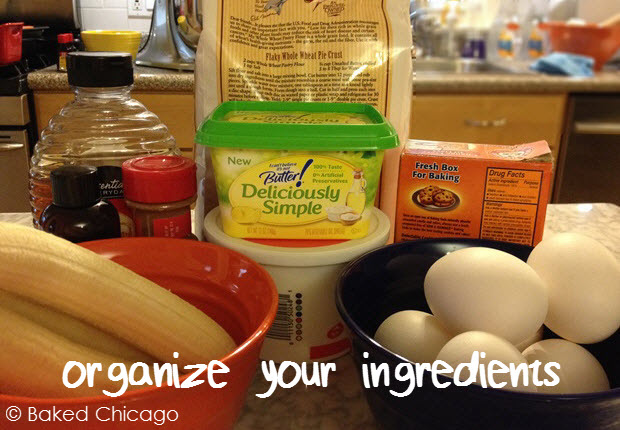
It’s always easier to execute a recipe by getting all of your ingredients organized first.
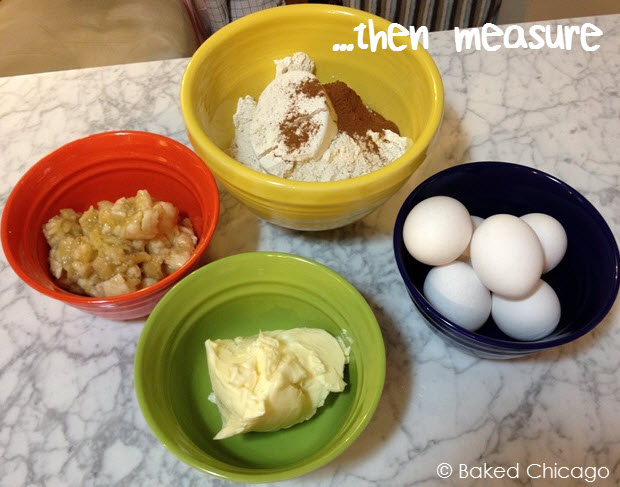
Then measure out each ingredient and sort by the order you’re going to use the ingredient in executing the recipe. This process, called ‘mise en place’ – which means everything in its place, will save you so much time and possible heartache. It’s like the law of gravity. It just works, so you gotta do it! Let’s get started.
You’re going to preheat your oven and preparing your baking pan. You can go traditional and grease-flour your pan but I’ve found that non-stick cooking spray, when applied correctly, works just as well and is much easier.
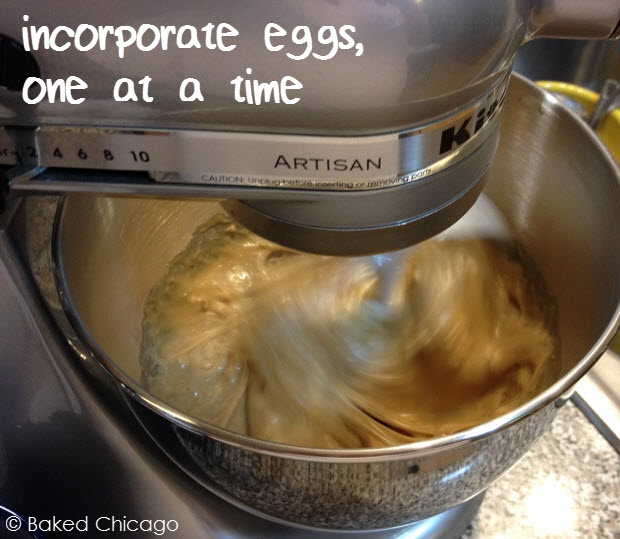
Sift together your dry ingredients: flour, salt, baking soda, baking powder and cinnamon. Next you’ll cream the butter product with the brown sugar and peanut butter. Be sure to incorporate lots of air into this mixture; it will help the pound cakes rise properly.
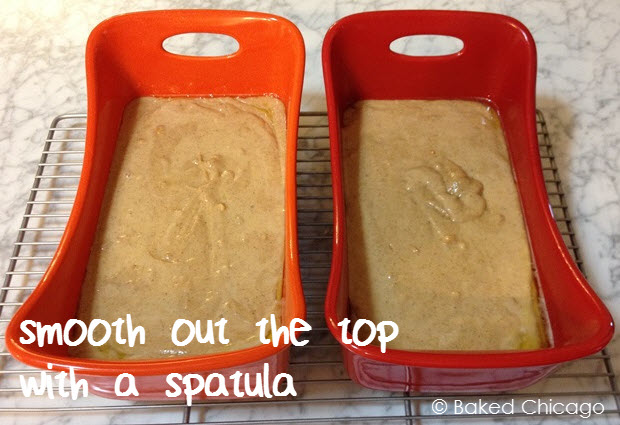
Add your eggs, as instructed, followed by the mashed banana and vanilla.Then add the flour mixture and sour cream, alternately. Then you’ll fold in the pistachios by hand with a spatula. Pour the batter into your prepared baking pan and smooth out the top with the spatula.
Bake for 50 to 65 minutes. I recommend checking at the 45-minute mark, because the baking process accelerates toward the end. It is very easy to over bake a pound cake, unless you are monitoring closely. The top should be golden brown and an inserted toothpick should come out clean.
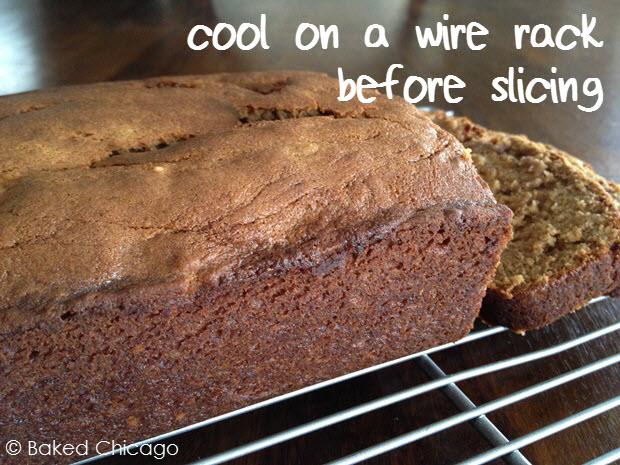
After cooling in the pan for about 10 minutes, remove and let cool complete on a wire rack. You can freeze a whole loaf for up to 2 months in an airtight container. But I recommend enjoying it warm fresh out of the oven!
1/2 cup ripe banana, mashed (about 2 small or 1 large banana)
1 tablespoon vanilla extract
1/2 cup sour cream
1/4 cup pistachios, chopped (optional)
Instructions
Preheat your oven to 350 F degrees. Generously coat a 9x5-inch loaf pan with non-stick cooking spray. Set aside.
In a medium bowl, sift together the flour, salt, baking soda, baking powder and cinnamon. Set aside.
In the bowl of a stand mixer, cream together the butter, brown sugar and peanut butter until light and fluffy (at least 5 minutes).
Add the eggs, one at a time, beating well after each addition. Scrape down the sides of the bowl, as needed, between additions. Add the mashed banana and vanilla.
Continuing on low speed, add the sifted flour mixture and sour cream, alternately; begin and end with the flour mixture. Beat just until combined. Fold in the pistachios with a spatula by hand.
Pour the batter into the prepared baking pan. Smooth out the top with your spatula.
Bake for about 50 to 65 minutes. The top should be gold brown and a toothpick inserted in the center should come out clean. If the top is browning too quickly, cover loosely with aluminum foil. I recommend checking your pound cake at the 45-minute mark. The baking process accelerates toward the end and it can be easy to over bake your cake.
Cool for at least 10 minutes in the pan before removing. The sides should start to come away from the pan to make removal easier. Then remove the loaf and cool completely on a wire rack.
Slice while still warm and enjoy with butter on top. Store any remaining slices in the refrigerator. The whole loaf may be frozen for up to 2 months.
The olive oil I selected for my recipe was Arbequina. Arbequina is native to the Mediterranean and the Middle East. Arbequina olives produce an extra virgin olive oil that is intensely aromatic and its flavor profile strikes a delightful balance between grassy and peppery notes, finishing with a buttery almond flavor.
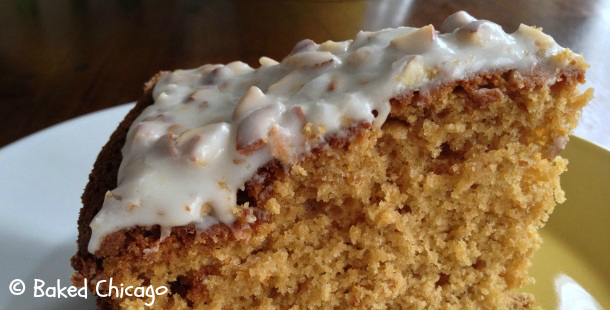
I thought that this particular olive oil flavor profile was perfect for an almond-olive oil cake – so I created a recipe for what I am calling Heavenly HALO Olive Oil Cake with a Brown Butter, Citrus & Almond Glaze. HALO stands for:
Honey,
Almond,
Lemon and
Orange
In both the cake batter and in the glaze, the honey, almond, lemon and orange come together in harmony with the olive oil for a symphony of (almost) sinful flavor.
The recipe is simple and you don’t have to bring out the stand mixer. Everything combines easily by hand in just a few mixing bowls.
When you taste the cake, you can tell that it’s made with olive oil because it’s so moist. And you don’t have to smother the cake in glaze because there’s a delicate sweetness to the cake itself that comes from the buttery almond flavor of the Pompeian Arbequina Extra Virgin Olive Oil.
I absolutely loved how this cake turned out and can’t wait to use the other Pompeian Varietals in my cooking. The other Pompeian Varietals are stronger, bolder in their flavor profiles and lend themselves more to savory dishes. But the Arbequina olive oil is so light and versatile that you could use it in almost any baking recipe.
What’s your favorite recipe for baking with olive oil? If you use the Arbequina extra virgin olive oil in your next baking recipe, be sure to share it here on Baked Chicago. I’d love to hear how it turned out for you. Now pardon me, but a slice of cake and a cup of coffee are calling my name….LOUDLY.
Preheat oven to 350F degrees. Generously grease and flour a 9-inch round cake pan. Set aside.
In a medium bowl, whisk together flour, baking powder and salt to thoroughly combine. Set aside.
In a large mixing bowl, whisk eggs to break up yolks. Add brown sugar and whisk it thoroughly. Add the olive oil and whisk until mixture is lighter in color and thickened (about 1 minute). Whisk in vanilla and almond extracts, followed by lemon zest and orange juice.
Add dry ingredients to the mixture and whisk until thoroughly combined. Continue whisking until batter is smooth and emulsified.
Pour batter into prepared baking pan. Bake for 45 to 55 minutes. Cake is done when it pulls away from the sides of pan and springs back lightly when touched. A cake tester or toothpick inserted should come out clean.
Allow cake to cool for 10 minutes in pan, then remove it and allow it to cool completely on a wire rack.
While cake cools, make the glaze. Melt butter over medium heat in a small saucepan. When butter is melted, lower heat and watch carefully until it turns a light tan color. Swirl in pan while heating to distribute heat evenly. It should smell slightly nutty. Turn off the heat and let it cool. It will continue to darken.
In a medium bowl, whisk milk with the confectioners' sugar until smooth. Slowly whisk in butter and lemon juice. Stir in chopped almonds. Spread the glaze on top of the cake and let it set.
I would never call a chocolate chip cookie boring to its face…but I might talk about it behind its back.
Have you ever craved something sweet and decadent but your brain and your mouth weren’t on the same page? Let me explain my predicament.
Yesterday my mouth really wanted to taste a chocolate chip cookie warm from the oven, but my mind was saying “how effin’ boring!” I personally don’t like confrontation, but when it involves my mind vs my mouth I step in to broker the peace.
As much as I really wanted to taste a chocolate chip cookie, I couldn’t muster the excitement to make a “plain ole chocolate chip cookie,” so I decided to browse the pantry for inspiration. That’s when I came across an unopened package of dried tart cherries, which I picked up over the holidays thinking I might make a cherry-banana bread or something equally festive.
Next to the dried cherries was my Sam’s Club-sized Quaker Oats Old-Fashioned Oats. And for a moment, I thought maybe I’ll make a cherry crisp or cherry cobbler. But that wasn’t my mission; I still wanted that chocolate chip cookie. So I thought why not combine them all into a chocolate chip cookie with oats (nice for added chewiness and fiber) AND the dried tart cherries (a nice counterpoint to the semisweet chocolate chips). My mouth was calling my brain “genius” and my mind was congratulating my mouth on having such good taste. Finally my stomach had to break up this mutual admiration society to get the recipe in motion.
Jazzy Oatmeal-Chocolate Chip Cookies
Because the inspiration for this recipe was to break out of the ordinary and try new ingredient combinations, I exchanged the butter I would normally use for some extra virgin olive oil. And I added a heaping tablespoon of ground cinnamon to play off the tart cherries to create a subtle cherry crisp flavor note.
This is a one-bowl recipe that is easy to mix by hand. Simply put all the dry ingredients (except the chocolate chips and dried cherries) in a very large mixing bowl. Whisk together to combine. Then add the wet ingredients. Stir to combine thoroughly, then fold in the chocolate chips and dried cherries.
If you don’t have a cookie scoop, you could take about 1 tablespoon of dough and roll it into a ball. I tested both techniques in the first batch and found that the cookies were more uniform and held together better on the baking sheet when I used the cookie scoop. Another trick for less mess: In addition to lining my baking sheets with parchment paper, I put parchment paper underneath the wire racks. That way any crumbs from the cooling process fall onto the parchment paper.
I also used a food styling trick that I learned watching some Food Network show: reserve some chocolate chips before folding them into the batter. Then put a few chips on top of each dough ball. That way each cookie will have chips on top, making it more visually appealing.
These cookies may look small, but they are dense and chewy. And nearly overflowing with chocolate chips. I rarely recommend “less chocolate” but in this recipe you could easily use half as many chocolate chips as called for in the recipe and you might not notice a difference in the taste.
I decided to call this recipe Jazzy Oatmeal-Chocolate Chip Cookies because with the addition of the dried tart cherries, rolled oats and ground cinnamon, this cookie is anything but boring.
What ingredients would you add to a basic chocolate chip cookie recipe to take it from drab to fab?
Preheat your oven to 350 F degrees. Line a baking sheet with parchment paper. Set aside.
In a very large mixing bowl, combine the oats, flour, brown sugar, baking powder, salt, olive oil, eggs and vanilla. Mix until combined and the dough is moist. The dough will be dense and crumbly. Fold in the cherries and chocolate chips.
Using a cookie scoop, place dough balls (roughly equivalent to 1 tablespoon of dough) on the prepared baking sheets about 1 inch apart.
Bake for 10 to 12 minutes, or until golden. Let cool for a few minutes on the baking sheet before transferring cookies to a wire rack to cool completely.
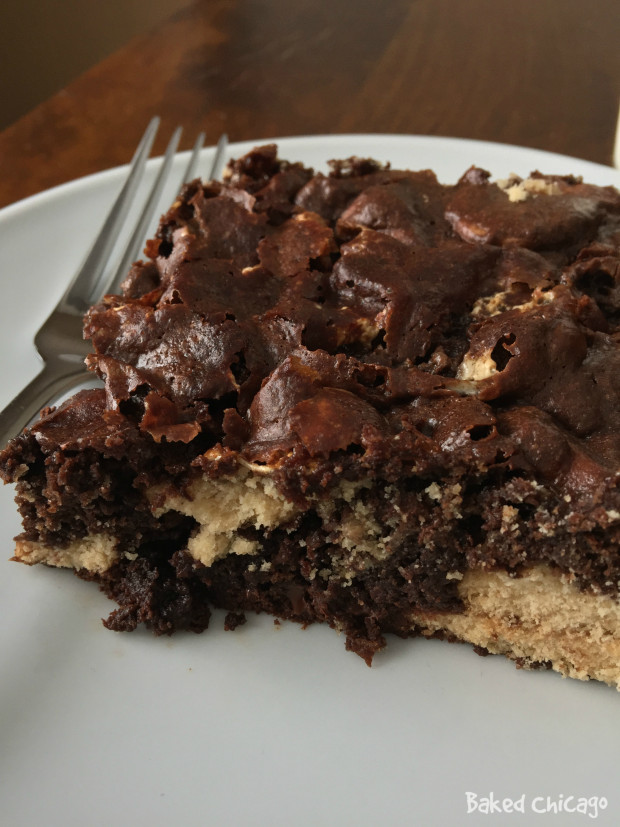
Animal crackers were a childhood favorite of mine, so when I came across some at the grocery store they became the inspiration for my next brownies creation that I call Marshmallow Cookie Crunch Brownies. You can use whatever cookies you have in your pantry.
Marshmallow Cookie Crunch Brownies
Prep Time: 15 minutes; Total Time: 45 minutes
Ingredients:
10 tablespoons unsalted butter
1 3/4 cups granulated sugar
3/4 cup unsweetened cocoa powder
1 cup all-purpose flour
1 teaspoon baking powder
2 cups animal crackers cookies (or substitute your favorite sandwich cookie, chopped)
1 teaspoon vanilla extract
4 eggs
pinch of sea salt
1 1/2 cups miniature marshmallows
2 cups semi-sweet chocolate chips
Directions:
Preheat your oven to 375 F degrees. Lightly grease the bottom of a 13×9-inch baking pan with butter or non-stick cooking spray. Set aside.
Whisk together dry ingredients (cocoa powder, flour, baking powder and salt) in a medium bowl; set aside.
In a large sauce pan, melt butter over low heat. Add granulated sugar, stirring until completely blended with butter. Stir in the flour mixture. When combined, remove from heat and set aside. The mixture will be very dry at this point.
In a large bowl, whisk together eggs and vanilla. Incorporate the egg mixture into the brownie batter in the sauce pan. Stir until well blended. Fold in the animal cracker cookies, marshmallows and chocolate chips.
Pour into the prepared baking pan. Spread the batter evenly to promote even baking. Bake for 25 to 30 minutes, or until set.
Let brownies cool completely, about 1 hour. Cut into 6 rows by 4 rows to make 24 brownies.
It’s National Cake Pop Day and one of my favorite “cake on a stick” treats is a dressed up in sprinkles brownie pop!
Brownie pops are perfect for any casual party or celebration, especially with guests who are kids or adults who want something sweet in portion-controlled bites. The brownie pop makes it easy to enjoy a bite of a great dessert that satisfies the sweet tooth.
Dipped in chocolate and decorated with sprinkles, they are irresistible for kids and adults!
2 ounces and 1 ounce unsweetened baking chocolate, divided
1 cup granulated sugar
3/4 cup all-purpose flour
2 eggs
1 teaspoon vanilla
1/4 teaspoon salt
1/2 cup confectioners' sugar
16 ounces almond bark (vanilla or chocolate-flavored)
40 lollipop sticks
nonpareils, jimmies and candies for decoration
Instructions
Preheat your oven to 350° F. Lightly grease an 8-inch square baking pan and set aside.
In a saucepan, combine 1/2 cup butter and 2 ounces of baking chocolate. Cook over medium heat, stirring constantly until melted. Remove from heat and set aside to cool slightly.
In a medium bowl, whisk together the granulated sugar, flour and salt. Pour in the almond bark mixture, and add the eggs and vanilla. Mix well.
Spread the batter evenly in the prepared baking pan. Bake for 22 minutes, or until the brownies begin to pull away from the sides of the pan. Cool pan completely, preferably on a wire rack.
Melt the remaining butter and baking chocolate in another saucepan over medium heat. Stir constantly until melted, and set aside.
Crumble the cooled brownies into a large bowl. Add the chocolate-butter mixture and confectioners' sugar and mix well.
Shape 1-inch balls with the crumbled brownie mixture. Place them on a parchment paper-lined rimmed baking sheet. Cover with plastic wrap and refrigerate until firm (at least 2 hours, but you may also refrigerate overnight).
Melt the almond bark according to package directions and keep warm. Remove one-third of the brownie balls from the refrigerator and insert the lollipop sticks. Dip the brownie balls into the melted almond bark coating. Swirl or tap off any excess. Press the coated brownie balls into your preferred decorations. I recommend using ramekins to hold each of the different decorations. At this point, you could also enlist the help of your birthday boy or girl to help with the decorating [yes, it's that easy].
Place the coated brownie pops onto parchment paper and let stand until the coating is set. Repeat with the remaining brownie pops until done. You can make these brownie pops up to one day before your event, but refrigerate any items in an airtight container.
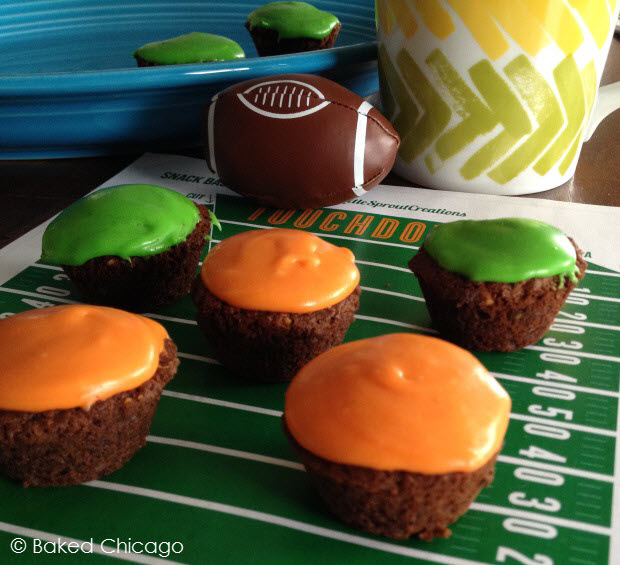
You’ve all heard of the fluffer nutter, right? A peanut butter and marshmallow cream sandwich. I don’t know a lot of football terms, but one I do know is “fumble.” And when I do brainstorming, I tend to think in sound-alikes so I started thinking about what I might do with a brownie for the Big Game. My brain went from ‘fumble’ to ‘fluffer nutter’ to ‘fumble nutter’ in about 90 seconds, so this brownie recipe incorporates yummy peanut butter and it’s topped with a marshmallow butter cream frosting.
After you’ve baked the Football Fumble Nutter Brownie Bites, let them cool on a wire rack or platter. Then prepare your frosting.
Frost half of your brownies in one team’s color, then the other. Let them set a bit after you frost them. I found they can set out for a few hours with no issues, but I recommend putting them in the refrigerator until you’re ready to serve them. We all know how long the Big Game can last and you want to make sure to practice proper food safety when entertaining your guests.
Football Fumble Nutter Brownie Bites (Peanut Butter Brownies with Marshmallow Butter Cream Frosting)
Rating: 51
Cook Time: 12 minutes
Yield: approximately 3 dozen
Ingredients
For Brownies:
1/2 cup butter
2 eggs
3/4 cup all-purpose flour
1/2 teaspoon baking powder
1/2 teaspoon sea salt
1/2 cup unsweetened cocoa powder
1 1/4 cups dark brown sugar
1/2 cup peanut butter
2 ounces milk
For Marshmallow Butter Cream Frosting:
1/2 cup butter, softened
8 ounces marshmallow creme
1 teaspoon vanilla extract
16 ounces confectioners' sugar
1 to 2 tablespoons milk, divided
food coloring (optional)
Instructions
For brownie bites: Preheat your oven to 350 F degrees. Generously grease a mini muffin pan with non-stick spray.
Melt the butter in a microwave-safe bowl. Add the milk and eggs to the melted butter. Stir in the peanut butter. Stir in all the dry ingredients and mix just until blended.
Using a small cookie scoop, add batter into the prepared mini muffin pan. Do not fill the mini muffin cups more than 2/3 full, or it will overflow into the others as it bakes.
Bake for about 12 minutes or until the brownies are dry around the edges. Cool before frosting.
For frosting: Place the butter, marshmallow cream and vanilla in a small bowl. Beat with electric mixer on medium until well blended. Gradually add the confectioners' sugar, beating after each addition until well blended.
Blend in 1 tablespoon of milk. Add remaining tablespoon, if necessary, for desired spreading consistency. Frost brownie bite and let set.


 I decided to macerate the Bing cherries in some Captain Morgan® 1671 rum. This Caribbean rum has aromas of sweet oak and dark fruit – with hints of chocolate. That makes it perfect for this olive oil cake with Bing cherries and dark chocolate chips.
  Macerating is just like marinating. I took a canning jar and filled it with pitted Bing cherries. Then I topped it off with Captain Morgan 1671 Rum. I let cherries soak for a few hours, but you could also let it soak overnight in the refrigerator. Just don’t throw out the rum after the cherries are done macerating! By itself it makes for a nice sipping companion while you’re baking – or a great addition to an ice cold Diet Coke.
  This batter is quite thick, so use a sturdy spatula or spoon when you start to incorporate the chocolate chips. You could also mix the Bing cherries into the batter, but I prefer to layer them evenly on the batter to ensure nearly every bite of this rich cake has a burst of rum-infused cherry in it.
 I like to serve this cake while it’s still warm. The chocolate, cherries and rum make for a seriously decadent flavor combination. Fresh Bing cherries and Caribbean spiced rum. Now that’s what summer should taste like!


")